Best Ever Chocolate Mousse Brownie Recipe
- Time: Active 30 minutes, Passive 25 minutes, Total 55 minutes
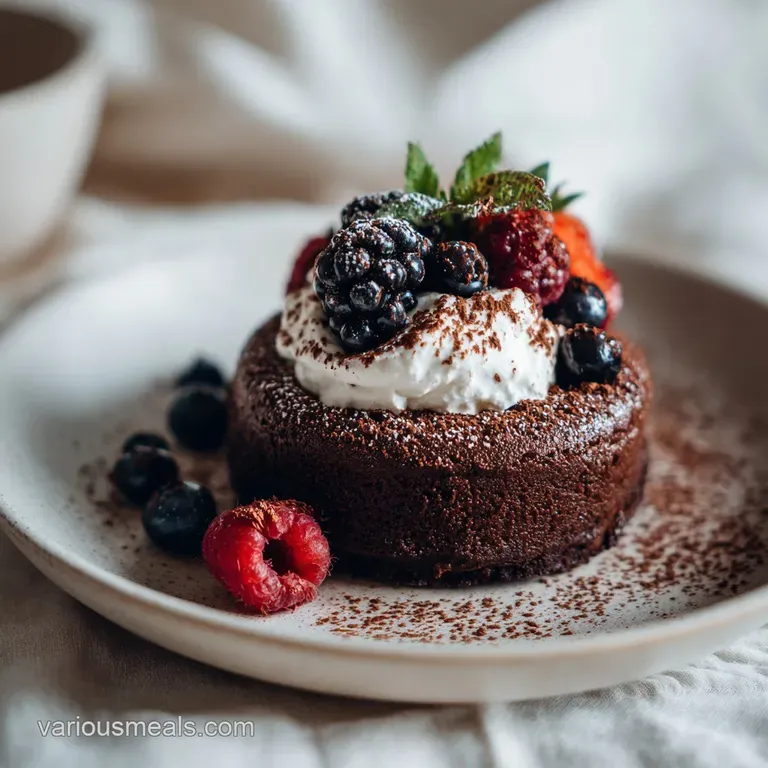
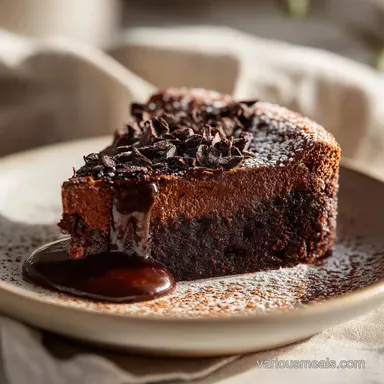
- Flavor/Texture Hook: A velvety yogurt mousse atop a brownie with a paper thin crust that will shatter under your fork
- Perfect for: Family gatherings, holiday dinners, or a cozy weekend treat
- Master the Best Ever Chocolate Mousse Brownie Recipe
- Why This Texture Contrast Works
- Choosing Your Premium Ingredients
- Kitchen Tools You Will Need
- The Foolproof Cooking Method
- Solving Common Brownie Mistakes
- Adapting for Special Diets
- Scaling Your Chocolate Masterpiece
- Debunking Baking Myths
- Storing Your Brownie Masterpiece
- Perfect Pairings for Chocolate
- Recipe FAQs
- 📝 Recipe Card
Master the Best Ever Chocolate Mousse Brownie Recipe
Imagine the kitchen filling with the heavy, dark scent of toasted cocoa and melting butter. There is a specific moment when you pull a pan of brownies from the oven and that top layer is so thin it looks like cracked parchment, barely holding back the rich, molten center. That is exactly what we are aiming for today.
I remember the first time I got this right, the house smelled like a professional pâtisserie, and I could hardly wait for the pan to cool. This isn't just another sugar bomb, it's a balanced, sophisticated dessert that plays with the deep bitterness of 70% dark chocolate and the bright, creamy tang of Greek yogurt.
The hero of this entire experience is the Dutch processed cocoa powder. While regular cocoa is quite acidic and pale, the Dutch processing (alkalizing) transforms it into something dark, mellow, and incredibly smooth.
It’s what gives this Best Ever Chocolate Mousse Brownie Recipe its signature mahogany hue and that earthy depth that lingers on your palate. When you whisk it into the melted butter, it blooms, releasing its oils and creating a flavor profile that is far more intense than any store-bought box mix could ever hope to achieve.
If you try to swap this for regular natural cocoa, you'll find the brownies are lighter in color and have a sharper, almost citrusy bite that clashes with the velvety mousse we're building on top.
We are looking for a specific contrast here, a dance between the fudgy, slightly chewy brownie and the cloud like mousse. Most people think a mousse brownie is just a brownie with some whipped cream, but we're going deeper.
We're using a Greek yogurt based ganache that provides a structural silkiness you won't believe until you taste it. It’s the kind of dessert that makes your friends ask for the recipe before they've even finished their first bite.
Let’s get the oven preheated to 175°C and start this journey together.
Why This Texture Contrast Works
The magic of this recipe lies in how we manipulate fats and sugars to create layers that feel completely different in the mouth but taste like a unified dream. Here is the lowdown on the mechanics of this bake.
- Aeration Control: Whisking the butter and sugar for a full 2 minutes creates tiny air pockets that help the eggs lift the batter just enough to avoid a "brick" texture while keeping it dense.
- The Sugar Crust: Using coconut sugar or light brown sugar provides moisture and also migrates to the surface during baking, creating that sought after "shatter" top.
- Greek Yogurt Stabilization: The protein in the yogurt provides structure to the mousse without the need for gelatin, keeping it creamy but firm enough to slice cleanly.
- Espresso Synergy: The instant espresso powder doesn't make the brownie taste like coffee, but it intensifies the chocolate's natural fruity and roasted notes.
Before we dive into the ingredients, let’s look at how to tell when each stage is perfectly executed. This is the fastest way to ensure your dessert turns out like a professional bake every single time.
| Thickness | Internal Temp | Rest Time | Visual Cue |
|---|---|---|---|
| Brownie Base (2cm) | 175°C (Oven) | 60 minutes | Slight wobble in the center with a thin, dull crust |
| Mousse Layer (1.5cm) | Room Temp | 2 hours (Fridge) | Glossy, mahogany sheen that doesn't run when tilted |
| Finished Square | N/A | 10 minutes | Clean edges when cut with a warm, dry knife |
Setting expectations early is key to a stress free bake. If you see that slight wobble at the 25 minute mark, don't panic. That wobble is the promise of a fudgy interior. If you wait until the center is firm, you've overbaked it into a cake, and we're not making cake today.
We're making the Best Ever Chocolate Mousse Brownie Recipe.
Choosing Your Premium Ingredients
To get that professional result, we need to be picky about what goes into the bowl. This isn't the time for low-fat swaps or imitation extracts. We want the real deal to ensure the fats emulsify correctly and the flavors are bold enough to stand up to the dark cocoa.
| Ingredient | Science Role | Pro Secret |
|---|---|---|
| Unsalted Butter | Provides the fat for fudginess and carries the cocoa flavor | Melt it gently so it doesn't separate, ensuring a smooth emulsion with the sugar |
| Large Eggs | Act as the primary binder and provide the lift and structure | Ensure they are at room temperature so they incorporate without curdling the butter |
| Dutch Cocoa | Provides deep color and mellow flavor without the acid of natural cocoa | Sift it twice to remove every single lump, which ensures a velvety batter |
| Full Fat Yogurt | Adds acidity and protein to stabilize the mousse topping | Whisk it in slowly to maintain the gloss of the dark chocolate ganache |
The choice of vanilla bean paste over extract is another small detail that makes a massive difference. Those little black flecks not only look beautiful but provide a much more rounded, floral aroma that balances the intense bitterness of the 70% dark chocolate. I've found that using room temperature ingredients is the one rule most people skip, but it's vital. When cold eggs hit melted butter, the butter seizes into tiny clumps. You want a smooth, silky batter from start to finish. For another lesson on ingredient temperatures, you might want to see how I handle eggs in my Easy Chocolate Chip Cookies recipe.
Ingredients and Substitutes
- 115g Unsalted butter, melted: Why this? Provides a rich, creamy mouthfeel and helps the brownie stay moist for days.
- Substitute: Salted butter (just omit the 1/2 tsp sea salt later).
- 200g Coconut sugar or light brown sugar: Why this? The molasses content creates the chewy, fudgy texture we need.
- Substitute: Granulated white sugar (will be crispier and less chewy).
- 2 Large eggs, room temperature: Why this? Provides structure and helps create that glossy, crackly top.
- Substitute: Flax eggs (note: result will be much denser and won't have the "shatter" top).
- 1 tsp Vanilla bean paste: Why this? Deep, concentrated vanilla flavor that stands up to heavy chocolate.
- Substitute: 2 tsp pure vanilla extract.
- 45g Dutch processed cocoa powder: Why this? For that dark, professional color and mellow, non acidic chocolate taste.
- Substitute: Natural cocoa powder (will be lighter and more acidic).
- 65g All purpose flour: Why this? Just enough to hold it together without making it cakey.
- Substitute: 1:1 gluten-free baking flour.
- 0.5 tsp Sea salt: Why this? Sharpens the chocolate flavor and balances the sweetness.
- Substitute: Table salt (use only 1/4 tsp).
- 1 tsp Instant espresso powder: Why this? Enhances the chocolate's complexity without adding a coffee taste.
- Substitute: Extra cocoa powder.
- 170g 70% Dark chocolate chips or chopped bar: Why this? High cocoa butter content ensures a smooth, glossy mousse.
- Substitute: Semi sweet chocolate (will be much sweeter).
- 240g Heavy whipping cream, divided: Why this? Provides the fat needed for a stable, luxurious ganache and mousse.
- Substitute: Full fat coconut milk (will add a slight coconut flavor).
- 120g Plain Greek yogurt (full fat), room temperature: Why this? Adds a necessary tang and stabilizes the mousse structure.
- Substitute: Sour cream (slightly thinner result).
- 2 tbsp Maple syrup: Why this? Adds a subtle floral sweetness to the mousse layer.
- Substitute: Honey or agave nectar.
- 0.25 tsp Sea salt: Why this? A tiny bit more for the topping to cut through the richness.
Kitchen Tools You Will Need
You don't need a high tech lab to make the Best Ever Chocolate Mousse Brownie Recipe, but having the right basics makes the process feel like a breeze. I always tell my friends that a kitchen scale is the best investment they'll ever make.
Measuring flour by the cup is a gamble, but measuring by the gram is a guarantee.
- 8x8 inch square baking pan: This is the standard size for the recipe. Using a larger pan will result in thin, dry brownies.
- Parchment paper: Essential for lifting the whole slab out of the pan. Don't rely on just greasing the pan, or the mousse will stick to the sides.
- Large mixing bowl: Give yourself plenty of room to whisk vigorously.
- Sifter or fine mesh sieve: Cocoa powder is notorious for clumps. Sifting is non negotiable here.
- Silicone spatula: Perfect for folding the flour in gently so you don't overwork the gluten.
- Double boiler or microwave safe bowl: For melting the chocolate for the mousse layer.
The Foolproof Cooking Method
This process is about patience and precision. We aren't just throwing things in a bowl; we're building layers of flavor. Pay close attention to the visual cues in each step.
- Prep the Environment: Preheat your oven to 175°C. Line your 8x8 inch pan with parchment paper, making sure there is enough overhang on the sides to act as "handles" later.
- Emulsify the Base: In your large bowl, combine 115g melted butter and 200g coconut sugar. Whisk vigorously for 2 minutes. Note: You are looking for the sugar to partially dissolve and the mixture to look slightly lightened.
- Incorporate Air: Add 2 large eggs and 1 tsp vanilla bean paste. Beat until the mixture is pale, voluminous, and leaves a "ribbon" when you lift the whisk.
- Sift and Fold: Sift 45g cocoa powder, 65g all purpose flour, 0.5 tsp sea salt, and 1 tsp espresso powder into the bowl. Fold gently with your spatula until no streaks of flour remain.
- The Bake: Pour the batter into the pan. Bake for 22–25 minutes. Check at 22 minutes: the edges should be set, but the center should still have a slight, jell o-like wobble.
- The Long Cool: Remove from the oven and cool completely in the pan. Note: If you add the mousse to a warm brownie, it will melt and become oily.
- Melt the Chocolate: Combine 170g dark chocolate with 60ml (1/4 cup) heavy cream and 2 tbsp maple syrup. Melt over a double boiler until the mixture is smooth and glossy.
- Stabilize the Mousse: Whisk 120g room temperature Greek yogurt and 0.25 tsp sea salt into the melted chocolate. It will turn a beautiful mahogany color.
- Final Whipping: Whip the remaining heavy cream until soft peaks form, then fold it into the chocolate yogurt mixture.
- The Setting: Spread the mousse over the cooled brownies. Refrigerate for at least 2 hours until the mousse is firm and velvety.
If you've ever made a Chocolate Cream Pie, you'll recognize the technique used for the mousse it's all about keeping that air in while ensuring the fat stays emulsified.
Solving Common Brownie Mistakes

Even the best of us have bad days in the kitchen. If your Best Ever Chocolate Mousse Brownie Recipe didn't turn out quite right, it's usually down to a small technical error. Let's look at why things might have gone sideways and how to fix them next time.
Why Your Brownies Are Cakey
A cakey brownie is usually the result of too much flour or over beating the eggs after the flour has been added. When you overwork the flour, you develop gluten, which creates a bread like structure rather than a fudgy one.
Also, check your measurements; if you used a cup instead of a scale, you might have packed 20% more flour than intended.
Why the Mousse Is Grainy
Grainy mousse happens when the chocolate is overheated or if the yogurt is too cold when added. Chocolate is very sensitive to temperature; if it gets too hot, the solids separate from the fat. If the yogurt is cold, it causes the cocoa butter in the melted chocolate to seize instantly, creating little gritty bits.
| Problem | Root Cause | Solution |
|---|---|---|
| Oily Brownies | Butter was too hot when eggs were added | Let melted butter cool for 5 mins before whisking in sugar and eggs |
| Runny Mousse | Yogurt was low-fat or cream wasn't whipped enough | Use full fat Greek yogurt and whip cream to firm (but not stiff) peaks |
| Tough Crust | Over mixed the batter after adding flour | Fold by hand only until the flour disappears; stop immediately |
Common Mistakes Checklist:
- ✓ Ensure eggs and yogurt are strictly at room temperature before starting.
- ✓ Pat your measuring tools dry; even a drop of water can seize melting chocolate.
- ✓ Don't skip the sifting; cocoa powder clumps are almost impossible to whisk out later.
- ✓ Resist the urge to cut the brownies while they are warm; the mousse needs time to set.
- ✓ Use a sharp knife dipped in hot water (and wiped dry) for those perfect, clean slices.
Adapting for Special Diets
One of the beautiful things about the Best Ever Chocolate Mousse Brownie Recipe is how adaptable it is once you understand the basic ratios. Whether you're cooking for someone with a gluten sensitivity or just want a different flavor profile, there are ways to tweak this without losing the soul of the dish.
gluten-free Optimization
This recipe is actually fantastic for gluten-free baking because it uses so little flour to begin with. You can swap the 65g of all purpose flour for a high-quality 1:1 gluten-free blend. Because there isn't much flour, you won't get that "gritty" texture often associated with GF bakes.
Just make sure your espresso powder and cocoa are certified gluten-free as well.
The Plant Based Twist
While this recipe relies heavily on dairy and eggs for its structure, you can make a vegan version. Use a vegan butter substitute, flax eggs (1 tbsp ground flax + 3 tbsp water per egg), and a coconut based yogurt. For the mousse, use the solid part of a chilled can of full fat coconut milk instead of heavy cream.
The texture will be slightly softer, but the flavor remains intensely chocolatey.
If you are looking for a simpler way to get your chocolate fix without the full baking process, you might enjoy my 5 Minute Mug Cake Recipe, which is much easier to adapt for single servings.
| Premium Ingredient | Budget Alternative | Flavor Impact | Savings |
|---|---|---|---|
| Vanilla Bean Paste | Pure Vanilla Extract | Slightly less floral aroma | Save $15-20 |
| 70% Dark Bar | Semi sweet Chips | Sweeter, less "adult" flavor | Save $3-5 |
| Coconut Sugar | Light Brown Sugar | Virtually no difference in texture | Save $2-4 |
Scaling Your Chocolate Masterpiece
Sometimes a 16 serving pan isn't enough, or perhaps it's too much for a quiet night in. Here is how you can scale the Best Ever Chocolate Mousse Brownie Recipe without ruining the chemistry.
Scaling Down (Making an 8 serving batch): Use a loaf pan (about 9x5 inches) instead of the square pan. Reduce the bake time by about 5 minutes, as the batter will be slightly shallower. For the eggs, since the recipe calls for 2, simply use 1 large egg.
Everything else can be halved exactly.
Scaling Up (Making a 32 serving batch): Double all ingredients and use a 9x13 inch baking pan. Note: Do not double the salt and espresso powder exactly; use 1.5x the amount (0.75 tsp salt and 1.5 tsp espresso) to avoid overpowering the dish.
The bake time will likely increase to 30-35 minutes because the thermal mass is greater.
For those planning a larger party where you need something even more decadent and pre portioned, check out my guide on Chocolate Covered Strawberries. They make a great side kick to these brownies.
Debunking Baking Myths
There is so much misinformation about brownies out there. Let's clear up a few things so you can bake with confidence.
- Myth: Searing the top with a broiler creates the crackle. Truth: The crackly top is actually a thin layer of meringue like crust formed when the sugar dissolves into the eggs. It’s all about the whisking at the beginning, not high heat at the end.
- Myth: You must use expensive "baking chocolate." Truth: While quality matters, a good quality dark chocolate bar from the candy aisle often has fewer stabilizers than "baking chips," leading to a smoother melt for your mousse.
- Myth: Brownies are done when a toothpick comes out clean. Truth: If a toothpick comes out clean, your brownies are overbaked. You want moist crumbs (not raw batter) clinging to the pick for a truly fudgy result.
Storing Your Brownie Masterpiece
Because this Best Ever Chocolate Mousse Brownie Recipe contains Greek yogurt and heavy cream in the mousse layer, it cannot sit out on the counter like a standard brownie.
Storage: Store your brownies in an airtight container in the refrigerator for up to 5 days. The cold actually improves the texture of the mousse, making it even more velvety.
If you find the brownie base gets too firm in the fridge, let a slice sit at room temperature for 10 minutes before eating.
Freezing: You can freeze these! Wrap individual squares tightly in plastic wrap and then foil. They will stay fresh for up to 3 months. To thaw, move them to the fridge overnight. Do not thaw them on the counter, or the mousse may weep.
Zero Waste Tip: If you have brownie scraps from leveling the top or edges that didn't look "perfect," don't toss them! Crumble them up and use them as a topping for vanilla ice cream, or fold them into a batch of Truffle Cake batter for extra texture. You can even blend the scraps into a milkshake for the ultimate chocolate experience.
Perfect Pairings for Chocolate
To truly round out the experience of this Best Ever Chocolate Mousse Brownie Recipe, think about what you serve alongside it. Since the dessert is very rich and dark, you want something that provides a bit of contrast either through temperature, acidity, or a different kind of sweetness.
A handful of fresh raspberries or tart cherries is my favorite way to serve these. The acidity of the fruit cuts right through the heavy cocoa butter, refreshing your palate between bites.
If you want to lean into the indulgence, a small dollop of lightly sweetened whipped cream or a scoop of salty pistachio ice cream is heavenly.
For a drink pairing, a strong cup of black coffee or a glass of cold milk is the classic choice. However, if it's a special occasion, a small glass of Ruby Port or a nutty Sherry works beautifully with the 70% dark chocolate.
The fortified wine shares many of the same flavor notes dried fruit, oak, and spice that we've built into the brownie base. Enjoy every single bite of this; you've earned it!

Recipe FAQs
Can I keep these brownies on the counter?
No, you must refrigerate them. Because the mousse layer contains Greek yogurt and heavy cream, storing them at room temperature is unsafe.
How to achieve the perfect brownie texture?
Bake only until the center has a slight wobble. Pulling them from the 350°F oven at the 22 25 minute mark ensures a fudgy interior rather than a dry cake like crumb.
Is it true the brownie base must be completely cool before adding the mousse?
Yes, this is essential for success. If you add the chocolate ganache mixture while the brownie is still warm, the mousse will melt and fail to set into a velvety layer.
How to handle the mousse if it looks grainy?
Whisk more vigorously until the emulsion stabilizes. If you enjoyed mastering this creamy no-bake technique here, you will find the same logic applies to ensuring a smooth, glossy consistency in other whipped desserts.
How to ensure the brownies release easily from the pan?
Line the 8x8 pan with parchment paper using an overhang on the sides. This creates a "sling" that allows you to lift the entire batch out cleanly once cooled.
Can I freeze these brownies for later?
Yes, they freeze exceptionally well. Wrap individual squares tightly in plastic wrap and store them in the freezer to keep the mousse layer firm and fresh for future cravings.
How to fix the brownie base if it feels too hard after refrigeration?
Let the slice sit at room temperature for 10 minutes. This brief rest allows the butter and chocolate solids to soften, restoring the ideal melt-in-your mouth texture.
Chocolate Mousse Brownies
Ingredients:
Instructions:
Nutrition Facts:
| Calories | 258 kcal |
|---|---|
| Protein | 3.6 g |
| Fat | 17.3 g |
| Carbs | 24.2 g |
| Fiber | 2.8 g |
| Sugar | 17.5 g |
| Sodium | 122 mg |
