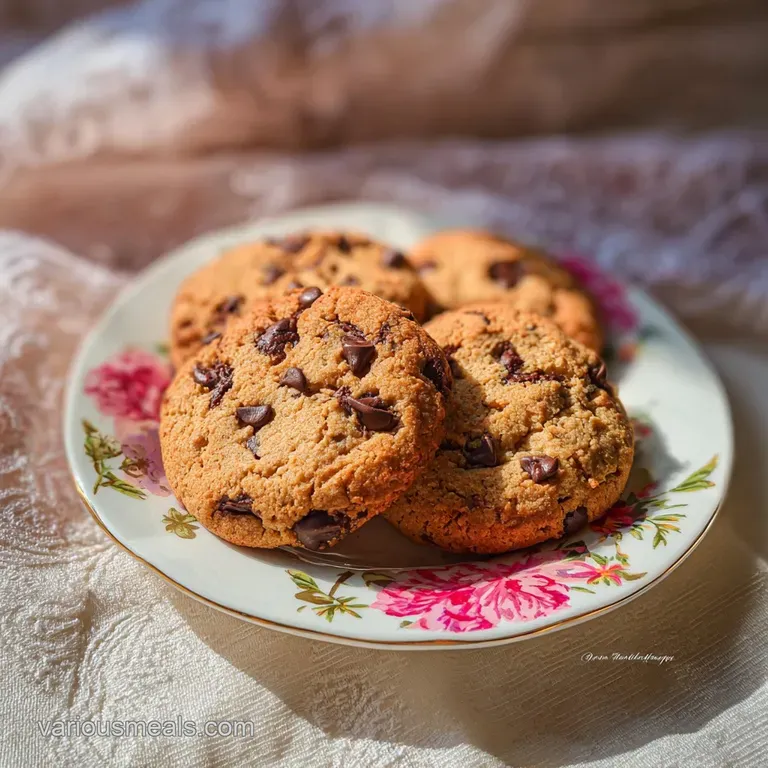
Easy Chocolate Chip Cookies for Beginners
- Time: Active 15 minutes, Passive 10 minutes, Total 25 minutes
- Flavor/Texture Hook: Shatter crisp edges with a velvety, molten chocolate core
- Perfect for: Stress free weekend baking or a quick beginner friendly treat
- Mastering Easy Chocolate Chip Cookies for Beginners
- Vital Planning for Stress Free Baking
- Selecting Quality Basics for Flavor
- Necessary Kitchen Tools for Results
- Executing the Simple Mixing Method
- Navigating Common Beginner Baking Errors
- Innovative Flavor Additions to Explore
- Preserving Freshness and Reducing Waste
- Presenting Your Warm Home Bakes
- Recipe FAQs
- 📝 Recipe Card
Mastering Easy Chocolate Chip Cookies for Beginners
The smell of browning butter and toasted sugar hitting the air is a sensory trigger that instantly takes me back to my first kitchen disaster. I remember standing over a bowl of rock hard dough, wondering why my cookies looked like sad, dry hockey pucks.
I had over beaten the butter and guessed on the flour measurements, a classic rookie mistake that most of us make at least once.
That kitchen fail taught me that you don't need a culinary degree to bake something incredible; you just need a method that respects the chemistry. This easy chocolate chip cookies for beginners recipe is my "redemption batch" because it uses melted butter, which removes the guesswork of "room temperature" consistency.
It’s the recipe I wish someone had texted me years ago when I just wanted a warm cookie without the stress.
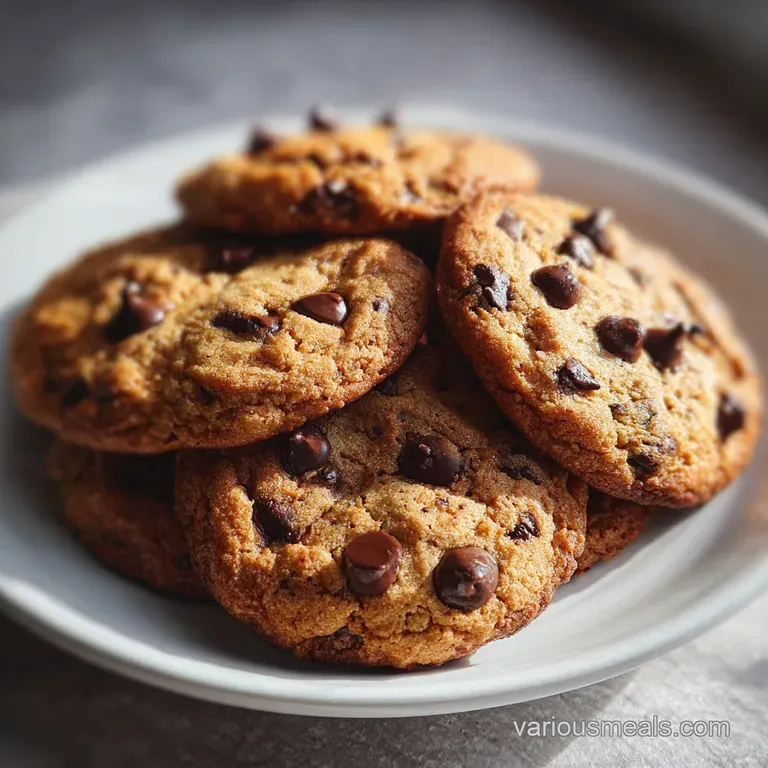
We are going for a specific texture here: a slight crunch on the rim that gives way to a soft, almost doughy center. Because we’re using more brown sugar than white, the result is deep, toffee like, and incredibly moist.
You don't even need a heavy duty stand mixer for this just a bowl, a whisk, and a bit of enthusiasm. Trust me, once you see those chocolate ripples swirling into the golden dough, you'll never go back to the store-bought stuff.
Vital Planning for Stress Free Baking
To get this right, we need to focus on the flow of the bake. Timing is everything when you want that velvety finish. If you pull them out too late, they’ll be crunchy; too early, and they’ll fall apart.
We’re aiming for that 10 minutes sweet spot in the oven where the edges are just starting to tan but the middle still looks a bit "underdone."
Chef Tip: Always pull your cookies out when the centers still look slightly soft and shiny. They will continue to firm up on the hot baking sheet for 5 minutes, a process called carryover cooking.
The Physics of the Chew: Using melted butter instead of softened butter limits the amount of air trapped in the dough, which prevents the cookies from becoming "cakey." This ensures the fat coats the flour particles immediately, inhibiting gluten development for a more tender, fudgy bite.
| Method | Time | Texture | Best For |
|---|---|---|---|
| Standard Melted | 10 minutes | Chewy and dense | Beginners wanting ease |
| Browned Butter | 15 minutes | Nutty and aromatic | Deep flavor enthusiasts |
| Chilled Dough | 24 hours | Thick and complex | Advanced texture prep |
Chilling the dough isn't mandatory here, but if you have the patience, 30 minutes in the fridge makes a world of difference. It allows the flour to fully hydrate, which stops the cookies from spreading too thin into a "pancake" shape on your tray.
Selecting Quality Basics for Flavor
When you’re making easy cookies for beginners, the quality of your staples matters more than you think. Since there are so few components, each one has to pull its weight. I always reach for a high-quality vanilla extract none of that imitation stuff because it acts as the bridge between the salt and the sugar.
| Ingredient | Science Role | Pro Secret |
|---|---|---|
| Brown Sugar (150g) | Adds moisture and acidity | Pack it tightly into the cup for accuracy |
| Baking Soda (1 tsp) | Encourages browning | Ensures the edges get that shatter crisp finish |
| All Purpose Flour (280g) | Provides structural framework | Spoon it into the cup; never pack it down |
For the dry components, 2 1/4 cups (280g) of all purpose flour is our baseline. Using a kitchen scale is the best way to avoid a dry cookie, but if you're using cups, use the "spoon and level" method. This keeps the dough light and prevents it from becoming a dense brick.
- 170g Unsalted Butter: Melted and cooled slightly. Why this? Melted fat creates a fudgier, more brownie like texture.
- 150g Brown Sugar: Dark or light works fine. Why this? The molasses content ensures a soft, chewy center.
- 100g Granulated White Sugar: For the crisp edges.
- 1 Large Egg: Room temperature is best. Why this? It emulsifies better with the fats for a smooth batter.
- 2 tsp Vanilla Extract: Use the good stuff!
- 1 tsp Baking Soda: Our leavening agent.
- 1/2 tsp Salt: To balance the sweetness.
- 250g Semi Sweet Chocolate Chips: high-quality chips or chopped bars.
- Sea Salt (Optional): To sprinkle on top.
| Original Ingredient | Substitute | Why It Works |
|---|---|---|
| Unsalted Butter | Salted Butter | Works fine, just omit the 1/2 tsp of extra salt |
| Brown Sugar | Coconut Sugar | Adds a toasted flavor, though cookies may be slightly drier |
| Chocolate Chips | Chopped Dark Chocolate | Creates irregular "pools" of chocolate rather than uniform dots |
Necessary Kitchen Tools for Results
You don't need a high end kitchen to pull off this easy chocolate chip cookie recipe for beginners. In fact, I often make these with just a sturdy wooden spoon and a glass bowl. However, having a few specific items will make your life much easier and the cleanup faster.
First, a large mixing bowl is non negotiable. You want enough room to fold the flour in without it flying all over your counter. A whisk is great for the wet ingredients to ensure the egg is fully incorporated, but switch to a spatula or spoon once you add the flour.
If you over work the dough with a whisk, you'll end up with tough cookies.
- Large Baking Sheets: Use light colored pans if possible.
- Parchment Paper: Prevents sticking and makes cleanup a breeze.
- Measuring Cups/Scale: For precision.
- Wire Cooling Rack: Essential for stopping the cooking process.
If you find yourself baking often, investing in a cookie scoop (about 2 tablespoons size) is a game changer. It ensures every cookie is the exact same size, which means they all finish cooking at the same time. No more burnt small ones and raw big ones!
Executing the Simple Mixing Method
- Prep the oven. Preheat to 350°F (175°C) and line two baking sheets with parchment paper.
- Melt the butter. Warm the 170g of butter in the microwave until just liquid, then let it cool for 5 minutes until it's no longer hot to the touch.
- Whisk the sugars. Combine the 150g brown sugar and 100g white sugar with the melted butter. Note: Whisk for about 1 minute until the mixture looks like wet sand.
- Add the liquids. Whisk in the egg and 2 tsp vanilla extract until the batter looks smooth and glossy.
- Incorporate dry goods. Stir in the 1 tsp baking soda and 1/2 tsp salt.
- Add the flour. Gently fold in the 280g of all purpose flour using a spatula. Stop as soon as no white streaks remain.
- Fold the chips. Mix in the 250g of semi sweet chocolate chips by hand.
- Portion the dough. Scoop rounded tablespoons (about 2 tbsp each) onto the sheets, spaced 2 inches apart.
- Bake the cookies. Bake for 9 to 11 minutes until the edges are golden but the centers look soft.
- Cool and salt. Sprinkle with sea salt immediately, let them rest on the pan for 5 minutes, then move to a rack.
Achieving Chewy Velvety Textures
The magic of easy cookies for beginners lies in the "folding" technique. Instead of stirring vigorously, use your spatula to cut through the middle and turn the dough over. This preserves the delicate structure and keeps the cookies from becoming aerated and tough.
Avoiding the Cakey Texture
If you find your cookies are rising too much like a muffin, you might be using too much egg or over whisking. This recipe uses one large egg for a reason it provides just enough protein to bind the fats without turning the dough into a sponge.
Navigating Common Beginner Baking Errors
One of the most frequent hurdles when making easy chocolate chip cookies homemade is the dreaded "spread." This happens when the butter is too hot or the oven isn't preheated correctly. If your first tray comes out looking like one giant cookie sheet, don't panic!
Just pop the remaining dough in the fridge for 20 minutes before baking the next batch.
Fixing Excess Cookie Spread
Spread usually boils down to temperature. If your kitchen is very warm, the butter in the dough will melt before the flour has a chance to set its structure in the oven. For another fail proof treat, you might want to try my 3 Ingredient Peanut Butter recipe, which is even more stable for new bakers.
| Problem | Root Cause | Solution |
|---|---|---|
| Cookies are flat | Butter was too hot or oven too cool | Chill dough for 30 mins; check oven temp |
| Cookies are dry/hard | Too much flour or overbaked | Use a scale for flour; reduce bake time by 2 mins |
| Bottoms are burnt | Dark baking pan or rack too low | Use parchment paper and move rack to the middle |
Common Mistakes Checklist
- ✓ Never use "spread" or margarine; only real butter works for this texture.
- ✓ Don't skip the salt! It’s what makes the chocolate flavor pop.
- ✓ Avoid over mixing once the flour is added to keep them tender.
- ✓ Let the baking sheet cool completely between batches.
- ✓ Use room temperature eggs so the fats don't seize up.
Innovative Flavor Additions to Explore
Once you've mastered the base of these easy chocolate chip cookies for kids to make, it's time to have some fun. The beauty of a simple chocolate chip cookie recipe for kids is that it’s a blank canvas. You can swap out the chips for M&Ms, chopped nuts, or even crushed pretzels for a salty twist.
If you’re looking to scale down for a smaller crowd, halving this recipe is easy. Just beat one egg in a small bowl and use exactly half of it (about 2 tablespoons). For a larger party, you can double the ingredients, but I recommend baking the trays one at a time to ensure even heat distribution in the oven.
Chef Tip: To get that professional "bakery look," save a handful of chocolate chips and press them into the tops of the dough balls right before they go into the oven.
For those who want a different kind of sweet treat without turning on the oven, my No Bake Cheesecake recipe is a fantastic companion to these cookies for a dessert spread.
Preserving Freshness and Reducing Waste
Storing these easy chocolate chip cookies with few ingredients is straightforward. They stay soft for about 3 to 5 days if kept in an airtight container at room temperature. Pro tip: put a slice of white bread in the container with the cookies.
The cookies will absorb the moisture from the bread, keeping them soft for much longer.
Freezing Instructions: You can freeze the baked cookies for up to 3 months. However, the real "pro move" is freezing the raw dough balls. Scoop them onto a tray, freeze until solid, then toss them into a freezer bag.
When the craving hits, you can bake one or two directly from frozen just add 2 minutes to the baking time.
For zero waste, take any broken cookie crumbs or "ugly" cookies and pulse them in a blender. These make an incredible crust for pies or a crunchy topping for vanilla ice cream. Never throw away a cookie!
Presenting Your Warm Home Bakes
There is nothing quite like serving a plate of these to friends while they’re still slightly warm. If you’re making these as easy cookie recipes for beginners for a gift, let them cool completely before stacking them in a jar or box to prevent them from sticking together.
For Restaurant Quality Flavor
To take these to the next level, try browning the butter first. Melt it in a saucepan over medium heat, swirling until it smells like toasted hazelnuts and you see little brown bits at the bottom. Let it cool completely before following the recipe as usual.
This adds a layer of sophistication that belies how simple the process actually is.
Decunking Baking Folklore
A common myth is that you must sift your flour. For a rustic, chewy cookie like this, sifting is actually counterproductive as it aerates the flour too much. Another myth is that you can't use "cold" eggs.
While room temperature is ideal for mixing, a cold egg won't ruin the batch it just might take an extra minute of whisking to get that glossy finish.
These 5 ingredient chocolate chip cookies (or close to it!) are proof that baking doesn't have to be a high stress "journey." It’s just about good ingredients, a little heat, and the patience to let them cool on the pan. Now, go grab a glass of milk and enjoy the fruits of your labor!

Recipe FAQs
What are the best cookies for beginners?
Easy chocolate chip cookies made with melted butter are the best for beginners. They eliminate the need for creaming butter and sugar, which reduces the risk of errors and ensures a chewy, fudgy texture without complex steps.
What cookie is the easiest to make?
Chocolate chip cookies using a melted butter method are incredibly easy. The primary advantage is skipping the creaming process; you simply melt butter, mix wet ingredients, then incorporate dry ingredients for a straightforward dough.
How to make cookie dough with 3 ingredients?
Combine 1 cup peanut butter, 1 cup sugar, and 1 egg. Mix thoroughly until a dough forms, then bake at 350°F (175°C) for about 10-12 minutes.
What are the 5 ingredient magic cookies?
These typically refer to a simple recipe using peanut butter, sugar, egg, vanilla, and chocolate chips. The "magic" comes from the simplicity and speed with which these can be combined and baked into delicious cookies.
Can I substitute softened butter for melted butter in this recipe?
No, stick with melted butter for this specific recipe. Using softened butter would require the creaming step, altering the texture and negating the ease of this beginner friendly method.
My cookies spread too much. What did I do wrong?
Excessive spread is usually due to butter being too hot or the oven not being fully preheated. Ensure your melted butter has cooled slightly and double check your oven temperature for consistent results.
How do I get that bakery style chewy center?
Pull the cookies out of the oven when the edges are golden but the centers still look slightly soft and underbaked. They will continue to cook on the hot baking sheet for several minutes, achieving that desirable chewy texture.
Easy Chocolate Chip Cookies
Ingredients:
Instructions:
Nutrition Facts:
| Calories | 186 kcal |
|---|---|
| Protein | 2.1 g |
| Fat | 9.1 g |
| Carbs | 25.8 g |
| Fiber | 1.0 g |
| Sugar | 16.4 g |
| Sodium | 105 mg |
