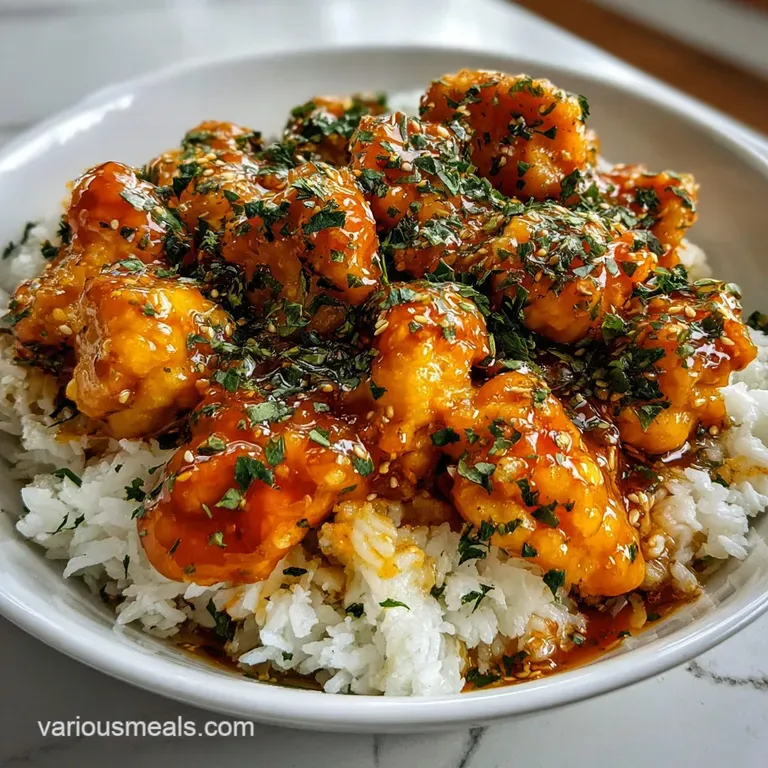
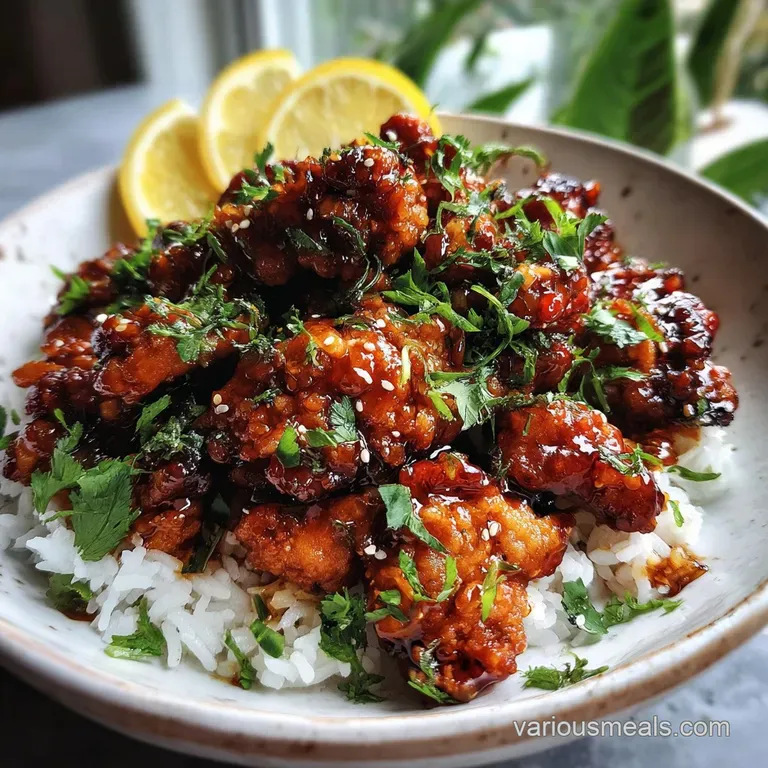
Honey Butter Chicken: Clingy Glaze
- Time: Active 10 mins, Passive 10 mins, Total 20 mins
- Flavor/Texture Hook: Shatter crisp exterior with a velvety, floral glaze
- Perfect for: A quick weeknight dinner that feels like high end comfort food
- Why This Flavor Profile Works
- The Science of the Glaze
- Deep Dive Into the Ingredients
- Everything You Need to Start
- Necessary Kitchen Tools for Success
- Simple Steps for Crispy Chicken
- Fix Common Mistakes and Problems
- Easy Ingredient Swaps and Twists
- Keep Your Leftovers Fresh Longer
- Perfect Side Dishes to Serve
- Myths About Honey Butter
- Recipe FAQs
- 📝 Recipe Card
Why This Flavor Profile Works
The secret to this dish lies in the chemistry of the coating and the physics of the sauce. We aren't just tossing chicken in flour; we’re creating a structural barrier. When the chicken hits the heat, the combination of all purpose flour and cornstarch creates a rigid, microscopic lattice.
This lattice is what gives us that "shatter" effect when we bite into it. Unlike plain flour, which can become gummy once the sauce is added, the cornstarch acts as a moisture blocker, ensuring the chicken stays succulent inside while the outside remains resilient against the honey glaze.
Speaking of the glaze, the real magic happens during the emulsification process. By adding cold, cubed butter to the hot honey and soy mixture at the very end, we are creating a stable fat in-water emulsion. The cold temperature of the butter allows it to melt slowly, allowing the milk solids to wrap around the sugar molecules in the honey. This results in a sauce that is thick, glossy, and "unctuous" rather than oily. It’s a technique similar to what I use for my Slow Cooker Honey recipe, where the balance of sweetness and fat is the primary goal.
- Starch Synergy: Cornstarch interferes with gluten development, creating a more brittle, crispier crust than flour alone.
- Cold Fat Emulsion: Dropping cold butter into hot liquid creates a thick, "velvety" coating that clings to the protein.
- Acidic Brightness: Apple cider vinegar breaks through the heavy sugars in the honey, preventing the dish from tasting "one note."
- Maillard Reaction: The honey caramelizes slightly upon contact with the hot chicken, deepening the savory profile.
Precision Timing and Doneness Check
| Chicken Thickness | Internal Temperature | Rest Time | Visual Cue |
|---|---|---|---|
| 1 inch cubes | 165°F | 2 minutes | Golden brown and firm to touch |
| 1.5 inch chunks | 165°F | 3 minutes | Crust is deeply bronzed and rigid |
| 0.5 inch strips | 165°F | 1 minute | Edges are dark gold and "shattery" |
Getting the temperature right is the difference between a juicy bite and something that feels like cardboard. Because we are cutting the chicken into small pieces, they cook remarkably fast. I usually start checking them around the four minute mark.
You want to see that the coating has completely dried out and turned into a hard shell. If it still looks pale or feels soft, give it another minute. The carryover heat during the resting phase will finish the center perfectly.
The Science of the Glaze
The physics of the gloss comes from the "monosaccharide suspension" where the honey’s fructose and glucose are thickened by the butter's fats. This creates a high viscosity liquid that resists soaking into the crust, keeping the chicken crispy for longer.
Deep Dive Into the Ingredients
Every ingredient in this lineup has a specific job. We aren't just seasoning; we’re engineering a specific texture. For example, using low sodium soy sauce is vital here. Regular soy sauce can become overwhelming once the sauce reduces and the sugars concentrate.
We want the salt to enhance the butter, not mask it. The smoked paprika provides a tiny hint of "char" flavor that mimics a grill, even though we’re staying strictly on the stovetop.
Component Analysis
| Ingredient | Science Role | Pro Secret |
|---|---|---|
| Cornstarch | Moisture Barrier | Mix it 1:2 with flour for the ultimate crunch |
| Honey | Hygroscopic Sweetener | Use a floral clover honey for a lighter finish |
| Cold Butter | Emulsifier | Never use room temp butter; it will break the sauce |
| Apple Cider Vinegar | pH Balancer | Adds a "tangy" backbone that cuts through the fat |
The chicken itself should be patted bone dry before you even think about the flour. Any surface moisture will turn your dredge into a paste, which leads to a heavy, doughy coating. I like to let my chicken sit on a paper towel for five minutes after cutting it.
It seems like a small step, but it’s the secret to getting that thin, crackly skin that everyone fights over.
Everything You Need to Start
Before we get to the stove, let's look at what we're working with. You’ll notice we are using cold, cubed butter this is non negotiable! If your butter is soft, the sauce will just turn into a greasy puddle. We want that emulsified, creamy look.
- 1.5 lbs chicken breast: Cut into 1 inch pieces. Why this? Breast meat stays firm and takes the coating better than thighs in this recipe.
- 0.5 cup all purpose flour: The base for our crust. Why this? Provides the protein needed for a structured coating.
- 0.25 cup cornstarch: Our "crunch" factor. Why this? Lowers gluten and helps the exterior stay crisp longer.
- 1 tsp garlic powder: For savory depth in the dredge.
- 0.5 tsp smoked paprika: Adds color and a subtle woodsy note.
- 2 tbsp neutral oil: Use something with a high smoke point like canola or grapeseed.
- 0.33 cup honey: The star of the show for sweetness and shine.
- 4 tbsp unsalted butter: Must be cold and cubed.
- 2 tbsp low sodium soy sauce: Provides the salty, umami backbone.
- 1 tbsp apple cider vinegar: For that essential acidic "zip."
- 3 cloves garlic: Minced fine to infuse the butter.
Ingredient Substitution Table
| Original Ingredient | Substitute | Why It Works |
|---|---|---|
| Apple Cider Vinegar | Rice Vinegar | Similar acidity but slightly sweeter profile |
| Honey | Maple Syrup | Thinner consistency; adds a woody, autumnal flavor |
| Cornstarch | Arrowroot Powder | Same moisture wicking properties; gluten-free friendly |
If you decide to swap the honey for maple syrup, keep in mind that maple syrup is more watery. You’ll need to simmer the sauce for an extra 2 minutes to get that same "clingy" consistency.
Also, if you’re out of garlic powder for the dredge, don’t try to use fresh garlic there it will burn in the oil. Stick to the dry spices for the coating and save the fresh stuff for the sauce.
Necessary Kitchen Tools for Success
You don't need a professional kitchen, but a few specific items make this much easier. A large, heavy bottomed skillet is your best friend here. Stainless steel or cast iron is preferred because they hold heat better than thin non stick pans.
When you drop cold chicken into a hot pan, you don't want the temperature to plummet, or the chicken will steam instead of sear.
I also highly recommend using a wire cooling rack. Once the chicken is fried, don't put it directly onto a plate. The steam escaping from the bottom of the nuggets will turn the underside soggy within seconds.
Placing them on a rack allows air to circulate, keeping the entire piece of chicken "shatter crisp" while you prep the glaze. It’s a tiny detail that makes a massive difference in the final texture.
Chef's Tip: Freeze your butter for 10 minutes before cubing it. This ensures it stays cold enough to properly emulsify the sauce without separating into oil.
Simple Steps for Crispy Chicken
- Prep the chicken. Pat the 1.5 lbs chicken breast dry with paper towels and cut into 1 inch pieces. Note: Dry chicken is the only way to get a real crunch.
- Create the dredge. Combine 0.5 cup flour, 0.25 cup cornstarch, garlic powder, paprika, salt, and pepper in a large bowl.
- Coat the pieces. Toss the chicken in the flour mixture until every nook and cranny is covered. Shake off any excess.
- Heat the pan. Add 2 tbsp neutral oil to a large skillet over medium high heat until the oil shimmers and ripples.
- Sear the chicken. Place chicken in the pan in a single layer. Cook for 4-5 minutes until the bottom is deeply golden and rigid.
- Flip and finish. Turn the pieces and cook for another 3-4 minutes until the chicken is cooked through and the exterior is crackling. Remove to a rack.
- Sauté the aromatics. Wipe out the pan, lower heat to medium, and add a tiny bit of oil. Sauté the 3 cloves minced garlic until fragrant but not browned.
- Build the base. Stir in 0.33 cup honey, 2 tbsp soy sauce, and 1 tbsp apple cider vinegar. Let it bubble for 1 minute.
- Emulsify the sauce. Turn off the heat. Whisk in the 4 tbsp cold cubed butter one piece at a time until the sauce looks velvety and opaque.
- Glaze and serve. Return the chicken to the pan and toss quickly until every piece is lacquered in gold. Serve immediately.
Fix Common Mistakes and Problems
One of the biggest issues people face is the sauce "breaking." This happens when the fat separates from the liquid, leaving you with a greasy mess. This usually occurs because the heat is too high when the butter is added. Always pull the pan off the burner before you start whisking in those butter cubes.
The residual heat is plenty to melt the butter while keeping the emulsion stable.
Another common pitfall is the chicken losing its crunch. If you let the chicken sit in the sauce for too long, the moisture will eventually win. This dish is meant to be eaten the moment it hits the plate.
If you're making this for a dinner party, have your sauce ready but don't toss the chicken in until everyone is actually sitting at the table.
Quick Fix Troubleshooting
| Problem | Root Cause | Solution |
|---|---|---|
| Soggy Coating | Chicken was wet or pan was crowded | Pat dry and cook in batches next time |
| Broken Sauce | Added butter to a boiling liquid | Whisk in cold butter off the heat |
| Burnt Garlic | Heat was too high during sauté | Cook garlic on medium low for 30 seconds only |
Common Mistakes Checklist
- ✓ Did you pat the chicken dry? (Essential for crust adhesion)
- ✓ Is the butter straight from the fridge? (Necessary for a glossy sauce)
- ✓ Are you using a large enough pan? (Crowding causes steaming, not searing)
- ✓ Did you shake off excess flour? (Prevents a gummy, thick coating)
- ✓ Is the vinegar added? (Balances the heavy honey sugar)
Easy Ingredient Swaps and Twists
If you want to take this in a different direction, it's incredibly easy to adapt. For a "Korean Honey Butter" vibe, you can add a teaspoon of toasted sesame oil and garnish with a mountain of thinly sliced scallions and toasted sesame seeds.
The sesame oil adds a nutty depth that complements the sweetness of the honey beautifully.
If you're looking for something with a bit more of a "Marry Me" vibe, similar to the creamy profile of a Marry Me Chicken recipe, you could stir in a tablespoon of heavy cream at the very end. It will make the sauce even more "velvety" and rich, though it will slightly soften the crunch of the chicken.
Decision Shortcut List
- If you want it spicy: Add 1 tsp of red chili flakes or a squeeze of Sriracha to the honey mixture.
- If you want it citrusy: Swap the apple cider vinegar for fresh lime juice and add a bit of zest at the end.
- If you want it extra crunchy: Double the cornstarch and decrease the flour by half for a "glass like" exterior.
Keep Your Leftovers Fresh Longer
This dish is best eaten fresh, but if you have leftovers, they can be saved. Store them in an airtight container in the fridge for up to 3 days. To reheat, I strongly suggest using an air fryer or a toaster oven. Microwave reheating will make the chicken soft and rubbery.
Five minutes at 350°F in an air fryer will help bring back some of that original "shatter" to the crust.
For zero waste, if you have extra sauce in the pan, don't throw it out! It makes an incredible glaze for roasted carrots or sweet potatoes the next day. You can even drizzle it over a bowl of plain white rice.
If you have extra flour/cornstarch dredge left over, you can use it to coat sliced mushrooms or zucchini for a quick fried side dish.
Perfect Side Dishes to Serve
Because this dish is quite rich and sweet, it pairs perfectly with something clean and bright. A simple bowl of steamed jasmine rice is the classic choice to soak up all that extra glossy sauce. I also love serving this alongside some quick pickled cucumbers or a tangy slaw.
The acidity in the pickles helps reset your palate between bites of the "unctuous" chicken.
If you want a more vegetable forward meal, roasted broccoli or snap peas work wonders. The charred edges of the broccoli catch the honey butter sauce perfectly. Whatever you choose, keep it simple. The chicken is the star here, and you want the sides to be the supporting cast that provides balance and crunch.
Comparison of Prep Methods
| Method | Texture | Time | Effort Level |
|---|---|---|---|
| Fresh Pan Fry | Shatter crisp and juicy | 20 mins | Medium |
| Air Fryer | Crispy but slightly drier | 15 mins | Low |
| store-bought Nuggets | Soft and doughy | 10 mins | Zero |
Myths About Honey Butter
One of the biggest myths is that you need a deep fryer to get crispy chicken. That’s simply not true. Shallow frying in just a couple of tablespoons of oil provides enough heat contact to create a Maillard reaction and a solid crust without the mess of a gallon of oil.
Another misconception is that honey will burn instantly. While honey does have a low burn point, it’s perfectly safe to bubble it for a minute or two as long as you have the soy sauce and vinegar in there to buffer the temperature.
Finally,, some people think you can use margarine or oil instead of butter for the sauce. While you can, you won't get that "velvety" emulsified texture. Butter contains milk solids and water that act as natural emulsifiers, which margarine often lacks in the right proportions.
Stick to the real deal for that signature glossy finish that makes this dish so famous. Trust me, your taste buds will thank you.

Recipe FAQs
What is honey butter chicken?
It is a dish featuring crispy pan-fried chicken coated in a glossy, emulsified sauce. The sauce balances sweetness from honey with savory soy sauce and tanginess from vinegar. The texture relies on a dual starch coating to keep the chicken crisp against the thick glaze.
Does butter chicken have honey in it?
No, traditional Indian butter chicken (Murgh Makhani) does not use honey. Classic recipes rely on tomatoes, cream, yogurt, and spices for their signature rich flavor. This recipe's flavor profile is inspired by Korean American fried chicken preparations.
Are honey and butter good together in savory cooking?
Yes, they create an excellent sweet and-fat base for glazes and sauces. When combined correctly using an emulsification technique like adding cold butter to hot liquid they form a velvety coating that clings perfectly to protein. Mastering this technique is key, similar to how we stabilize fats in our Chocolate Chip Cookies recipe where fat consistency matters greatly.
What is honey butter sauce good on?
It is excellent on almost any lightly fried or roasted protein. Beyond chicken, it works well tossed with crispy tofu or shrimp due to its clingy texture. It can also be brushed onto biscuits or used as a drizzle over savory baked potatoes.
How do I prevent the crispy coating from becoming soggy after glazing?
Toss the chicken in the sauce only moments before serving. The coating achieves its resilience through a combination of cornstarch and rapid searing, which creates a moisture barrier.
You must ensure the sauce is finished (emulsified) and then immediately toss the fried pieces; prolonged sitting will inevitably soften the crust.
How do I ensure the cold butter properly emulsifies into the hot glaze?
Remove the pan completely from the heat source before whisking in the cold butter cubes. The residual heat is sufficient to melt the butter slowly, allowing the milk solids to bind with the liquid ingredients.
If the liquid is boiling, the fat will separate into an oily mess instead of creating that glossy, unctuous finish.
Can I use chicken thighs instead of breasts for this recipe?
Yes, chicken thighs are an excellent substitution that remains juicier. Thigh meat has a higher fat content, which makes it more forgiving during the quick frying process. You may need to add 1-2 minutes to the cook time to ensure they reach the safe internal temperature of 165°F.
Honey Butter Chicken In 20 Min

Ingredients:
Instructions:
Nutrition Facts:
| Calories | 623 kcal |
|---|---|
| Protein | 54.8 g |
| Fat | 24.5 g |
| Carbs | 43.3 g |
| Fiber | 0.8 g |
| Sugar | 23.4 g |
| Sodium | 512 mg |
