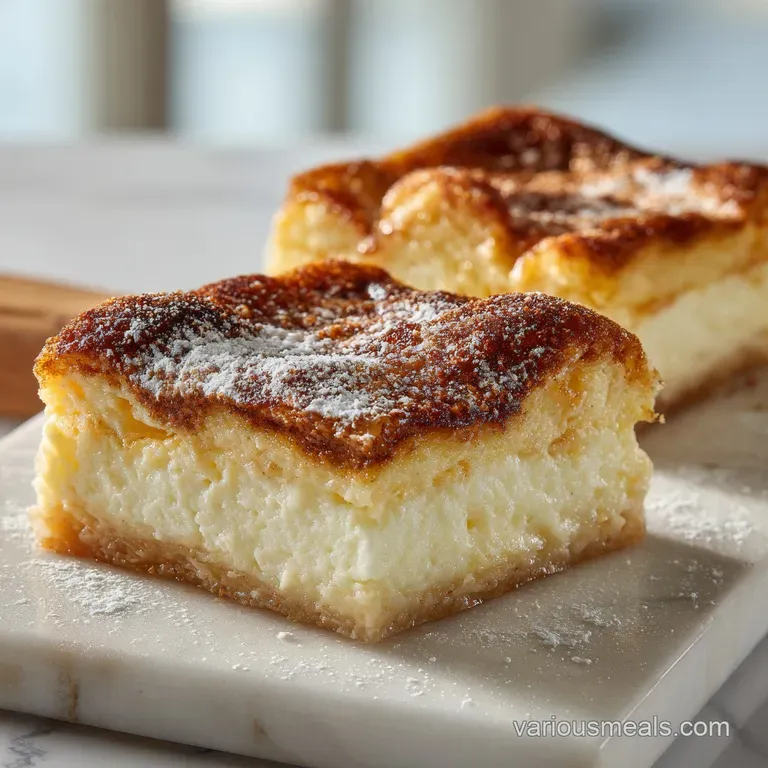
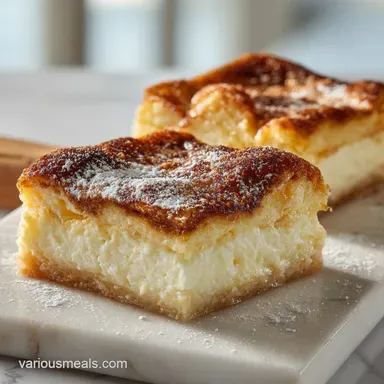
Sopapilla Cheesecake Bars: Crispy and Creamy

- Time: Active 15 minutes, Passive 30 minutes, Total 45 minutes
- Flavor/Texture Hook: Shatter crisp cinnamon crust with a silky, melt in-your mouth cream cheese core.
- Perfect for: Potlucks, family gatherings, or whenever you need a high reward dessert with low effort prep.
- Why the Butter Bath Creates That Signature Crispy Crunch
- Measuring Success with Precise Timing and Proportions
- Selecting the Best Components for Velvety Cheesecake Centers
- Essential Kitchen Tools for a Flawless Bake
- Step by Step Guide to Perfect Sopapilla Cheesecake Bars
- Fixing Common Issues for a Golden Finish
- Adjusting Your Recipe for Parties or Small Batches
- Debunking Myths About Working with Refrigerated Dough
- Keeping Your Bars Fresh and Using Every Bit
- Traditional and Modern Ways to Enjoy Every Bite
- Recipe FAQs
- 📝 Recipe Card
Why the Butter Bath Creates That Signature Crispy Crunch
The biggest disappointment with most crescent roll desserts is a middle layer that feels doughy or raw. We've all been there, biting into something that looks golden on top but feels like wet cardboard underneath.
This specific version of Sopapilla Cheesecake Bars works because we manipulate the moisture and fat to create an "oven fried" effect on the top crust.
When you pour that half cup of melted butter over the raw crescent dough, you aren't just adding flavor. You're creating a barrier. As the oven heat hits that butter, it sizzles against the sugar and cinnamon, essentially frying the top layer of the dough.
This creates a "shatter" texture that mimics a traditional fried sopapilla. Meanwhile, the sugar in the filling draws just enough moisture from the bottom dough to keep it tender but cooked, thanks to the sugar's hygroscopic nature.
How the Layers Stay Separate
- Fat Saturation: The melted butter coats the starch molecules in the top dough, preventing them from absorbing too much moisture from the steam rising out of the cheesecake filling.
- Protein Stabilization: Using a room temperature egg binds the cream cheese and sugar into a stable matrix that won't "weep" liquid into the bottom crust during the 30 minutes of baking.
- Steam Management: Pinching the seams of the bottom layer creates a sealed vessel, allowing the filling to steam cook the bottom dough from the top down rather than letting juices leak underneath.
| Method Type | Prep Effort | Final Texture | Best For |
|---|---|---|---|
| Fresh Dough | High (2 hours) | Very flaky/Yeasty | Weekend projects |
| Shortcut (This Recipe) | Low (15 minutes) | Tender/Buttery | Weeknight cravings |
| Puff Pastry | Medium (30 minutes) | Multi layered/Crispy | Elegant dinner parties |
This comparison shows why we stick with the crescent roll method for the best Sopapilla Cheesecake Bars. While fresh dough is lovely, the refrigerated shortcut provides a specific tang and soft crumb texture that pairs perfectly with the Philadelphia cream cheese. It is the ultimate balance of effort and outcome.
Measuring Success with Precise Timing and Proportions
I remember the first time I tried making these without a plan. I used a smaller pan because it was all I had clean, and the middle stayed completely liquid while the top burnt to a crisp. It was a disaster. To get that iconic look and feel, you really have to stick to the 9x13-inch dimensions.
This ensures the cheesecake layer is exactly the right thickness to set in the 30 minutes it takes for the dough to go golden.
The temperature is also non negotiable. We're aiming for 350°F (175°C). Any hotter and the sugar in the topping will caramelize into a hard candy shell before the dough underneath is actually cooked through.
Any cooler and the crescent rolls will just soak up the butter and turn into a greasy mess.
| Component | Science Role | Pro Secret |
|---|---|---|
| Philadelphia Cream Cheese | Structural base | Always use full fat blocks; tub versions have too much air and water. |
| Granulated Sugar | Moisture control | It breaks down the protein in the cream cheese for a silkier mouthfeel. |
| Melted Butter | Heat conductor | Pour it while warm to help the cinnamon sugar "bloom" immediately. |
| Large Egg | Emulsifier | Acts as the glue that keeps the fats and liquids from separating. |
Using the right ingredients is half the battle. If you're a fan of creamy textures, you might find similarities in how the filling sets compared to a No Bake Cheesecake, though our baked version here is much more structural and dense. The egg is the key difference there, providing that "lift" and setting power that survives the oven heat.
Selecting the Best Components for Velvety Cheesecake Centers
Let's talk about the stars of the show. You need 2 cans (8 oz each) of refrigerated crescent rolls. Don't go for the "reduced fat" ones. They lack the gluten structure needed to hold up the heavy cheesecake filling, and they won't crisp up the same way.
For the core, 16 oz of Philadelphia cream cheese is the standard for a reason. It has a specific stabilizer (usually carob bean gum) that keeps it from turning into a puddle under heat.
The sugar is split into two roles. You'll need 1 cup of granulated white sugar for the filling and another 1/2 cup for the topping. Mixing 1 tbsp of ground cinnamon into that topping sugar is what provides the "sopapilla" soul of the dish. I also highly recommend using a high-quality pure vanilla extract.
Since there are so few ingredients, you will really taste the difference between the real stuff and the imitation clear liquids.
Ingredient Substitutions
| Original Ingredient | Substitute | Why It Works |
|---|---|---|
| Unsalted Butter | Salted Butter | Adds a savory note that balances the heavy sugar. |
| Crescent Rolls | Puff Pastry | Creates more "shatter" but is less sweet. Note: Needs 5 extra mins. |
| Granulated Sugar | Brown Sugar (Topping) | Adds a molasses/toffee flavor but is less "authentic" to sopapillas. |
If you find yourself enjoying the spiced, bready nature of this dessert, you might also love the texture of Oatmeal Fig Bars. Both recipes rely on a layered approach where a soft filling is sandwiched between distinct structural elements, though the Sopapilla Cheesecake Bars are significantly more indulgent.
Essential Kitchen Tools for a Flawless Bake
You don't need a professional pastry kitchen to pull this off, but a few specific items will make your life much easier. A 9x13-inch baking dish is your canvas. Glass or ceramic works best here because they distribute heat more evenly than thin metal pans, which can scorch the bottom dough before the middle is set.
A handheld electric mixer is my preferred tool for the filling. You could use a stand mixer, but it's almost overkill for 16 oz of cheese. The goal is to get the mixture "glossy," which usually takes about 2 minutes of medium speed beating.
Using a whisk by hand is a workout you probably don't want, and it often leaves tiny "beads" of unmixed cheese that show up as white spots in your finished bars.
Chef's Note: If you forgot to take your cream cheese out of the fridge to soften, don't microwave it on high. Instead, submerge the sealed foil blocks in a bowl of warm water for 10 minutes. This softens it evenly without melting the edges.
step-by-step Guide to Perfect Sopapilla Cheesecake Bars
- Prep the environment. Preheat your oven to 350°F (175°C). Lightly grease your 9x13-inch dish with cooking spray. Note: This ensures the bottom crust can be lifted out cleanly later.
- Lay the foundation. Unroll the first can of crescent dough and stretch it across the bottom of the pan. Firmly pinch the seams together until you smell the faint, yeasty scent of the raw dough.
- Cream the base. In a bowl, beat the 16 oz of softened cream cheese and 1 cup of sugar. Stop when it looks silky and shiny.
- Incorporate the binders. Add the room temperature egg and 1 tsp vanilla. Mix on low until you hear the batter sounding thick and "heavy" against the beaters.
- Spread the center. Pour the filling over the dough. Spread it to the edges, but leave a tiny 1/4 inch gap. Note: This allows the top and bottom dough layers to fuse slightly at the sides.
- Apply the roof. Carefully unroll the second can of dough and drape it over the cream cheese. Stretch it gently to reach the corners.
- The butter bath. Pour the 1/2 cup of melted butter evenly over the top. It might look like too much butter, but trust me, the dough needs it to fry.
- Add the spice. Sprinkle the cinnamon sugar mixture (1/2 cup sugar + 1 tbsp cinnamon) over the butter. You should smell the sharp, warm aroma of cinnamon immediately.
- The bake. Slide it into the oven for 30 minutes. Bake until the top is puffed and deep golden brown. You'll hear a slight sizzle if you listen closely when you pull it out.
- The finish. Drizzle with 2 tbsp of honey while it's still hot. Let it cool completely at room temperature, then chill for at least 2 hours. Note: Cutting these warm will result in a messy, flowing center.
Fixing Common Issues for a Golden Finish
The most common "fail" with this recipe is the bars being too soft to pick up. This usually happens for one of two reasons: either the cream cheese wasn't beaten enough with the egg to create a structure, or the bars weren't chilled long enough. Remember, cheesecake is technically a custard.
It needs cold temperatures to set the fats and proteins back into a solid state.
Another issue is the "bubble." Sometimes the top layer of dough puffs up like a balloon in the oven, leaving a huge air gap between the crust and the filling. If you see this happening halfway through baking, don't panic. Just take a small paring knife and very gently prick the bubble to let the steam escape.
It will settle back down onto the cheese.
Why Your Crust Is Soggy
If the bottom layer feels gummy, it's usually because the oven wasn't fully preheated or the pan was placed too high in the oven. The bottom needs direct heat from the lower element to "set" before the moisture from the cheese can soak in. Always bake on the middle rack.
| Problem | Root Cause | Solution |
|---|---|---|
| Top is burnt but dough is raw | Oven temp too high | Tent with foil and lower heat to 325°F (165°C). |
| Filling is runny | Didn't add the egg | Unfortunately, it won't set. Serve it as a "spoon dessert" over ice cream! |
| Sugar topping is gritty | Butter was too cold | Ensure butter is fully melted so it dissolves some of the sugar. |
Common Mistakes Checklist
- ✓ Never use "tub" cream cheese; the water content is too high for baking.
- ✓ Ensure the egg is at room temperature to prevent the cheese from curdling.
- ✓ Don't skip the chilling process; 2 hours is the absolute minimum for clean slices.
- ✓ Pinch those seams like your life depends on it to prevent filling leaks.
- ✓ Use a glass pan if possible to monitor the browning of the bottom crust.
Adjusting Your Recipe for Parties or Small Batches
If you're making these for a huge crowd, you can easily double the recipe. However, don't just put it all in one giant pan. Use two separate 9x13-inch dishes. This ensures the heat can reach the center of the bars effectively. If you crowd too much dough into a single deep pan, the middle will never cook through.
Scaling down is a bit trickier because of the crescent roll cans. If you want a half batch, use an 8x8-inch square pan. You’ll use one can of dough cut it in half, using one half for the bottom and one for the top. For the egg, beat it in a small cup and use exactly half of the liquid.
- Spices
- If doubling, only use 1.5x the cinnamon to avoid it becoming bitter.
- Sugar
- Keep the 1:1 ratio for the filling to ensure it sets properly.
- Baking
- If putting two pans in the oven at once, rotate them halfway through (front to back and top to bottom) to account for hot spots.
Debunking Myths About Working with Refrigerated Dough
There is a common myth that you should "pre bake" the bottom layer of dough to keep it from getting soggy. Don't do it! If you pre bake the bottom, it will shrink away from the edges, and when you add the wet filling, it will slide underneath the crust, making a mess that’s impossible to slice.
The raw dough needs to bond with the filling to create that seamless bar structure.
Another misconception is that you need to "proof" or let the crescent dough sit out. These are chemically leavened, meaning they react to the heat of the oven, not yeast and time. Take them straight from the fridge to the pan.
If the dough gets too warm on the counter, the fat in the dough starts to melt, and you lose that flaky texture.
"Searing the dough" is another weird tip I've seen online. Some people suggest frying the dough in a pan before assembling. This is completely unnecessary and honestly makes the bars way too oily. The butter pour method provides all the "frying" flavor you need without the extra dishes or burnt fingers.
Keeping Your Bars Fresh and Using Every Bit
These bars are actually better on day two. The flavors of the cinnamon and vanilla have time to really get to know each other, and the crust softens just a tiny bit into a pleasant chewiness. Store them in the fridge, covered tightly with plastic wrap or in an airtight container.
They will stay fresh and delicious for up to 5 days.
If you have leftovers that are starting to lose their "crunch," you can actually pop them into an air fryer at 350°F (175°C) for just 2 minutes. It revitalizes the butter in the top crust and makes them taste like they just came out of the oven.
- Freezing
- You can freeze these! Wrap individual bars in parchment paper, then foil. They stay good for 3 months. Thaw in the fridge overnight don't microwave from frozen or the cheese will explode.
- Zero Waste
- If you have "ugly" end pieces or crumbs, don't toss them. Crumble them up and use them as a topping for vanilla bean ice cream or fold them into a morning yogurt bowl.
- Crescent Scraps
- If you have leftover dough from trimming the edges, roll them in cinnamon sugar and bake them alongside the pan as "chef's snacks."
Traditional and Modern Ways to Enjoy Every Bite
The traditional way to serve Sopapilla Cheesecake Bars is cold, cut into neat rectangles, with an extra drizzle of honey. The honey is essential it mimics the way you'd eat a real sopapilla in a New Mexican restaurant.
If you want to get fancy, a dollop of whipped cream and a single fresh raspberry on top adds a nice acidic pop to cut through the richness.
For a modern "A La Mode" experience, try heating a bar for 15 seconds in the microwave (just enough to take the chill off) and topping it with a scoop of salted caramel ice cream. The way the cold ice cream melts into the warm cinnamon sugar crust is something you'll be thinking about for weeks.
If you’re serving these at a party, I like to cut them into smaller "bite sized" squares, about 2 inches each. They are very rich, so people often appreciate a smaller portion though they usually come back for three or four more.
Just make sure to keep them on a chilled platter if it's a warm day, as the cream cheese filling will soften if left in the sun for too long. Enjoy the process, and don't worry if the top isn't perfectly smooth; those cracks and ridges are where the honey and butter pool to create the best bites!

Recipe FAQs
Is it necessary to use a double boiler to melt the butter for the topping?
No, this is a common misconception. You can simply melt the butter in a microwave safe bowl using short bursts until liquefied, which is much faster and works perfectly for this recipe.
How to ensure the bottom crescent roll layer stays intact?
Firmly pinch all seams of the dough together after stretching it into the 9x13-inch pan. Creating this tight, leak proof seal prevents the cream cheese filling from bubbling out during the 30-minute bake time.
Is it true that you can bake these at 400°F to speed up the process?
No, this is a common misconception. You must keep the temperature at 350°F (175°C) to ensure the center sets properly without burning the delicate crescent roll crust.
How to prevent the cream cheese layer from leaking out of the edges?
Leave a 1/4 inch border around the edges when spreading the filling over the bottom dough. This small gap allows you to seal the top and bottom dough layers together securely, keeping the filling contained.
Should I slice the bars while they are still hot from the oven?
No, wait until the bars are thoroughly chilled. Slicing while warm will cause the cream cheese layer to smear, whereas chilling them allows the filling to firm up into clean, professional looking squares.
How to achieve a perfectly golden and crisp top crust?
Pour the melted butter evenly over the dough before sprinkling the cinnamon sugar mixture. The butter helps the dough turn golden brown and creates the classic sweet, crisp finish characteristic of a sopapilla.
Is it required to add honey to the finished bars?
No, it is strictly optional. While a drizzle of honey while the bars are still warm provides an authentic touch, the recipe is perfectly sweet and delicious even without it.
Sopapilla Cheesecake Bars
Ingredients:
Instructions:
Nutrition Facts:
| Calories | 294 kcal |
|---|---|
| Protein | 2.8 g |
| Fat | 17.6 g |
| Carbs | 30.9 g |
| Fiber | 0.3 g |
| Sugar | 21.2 g |
| Sodium | 122 mg |
