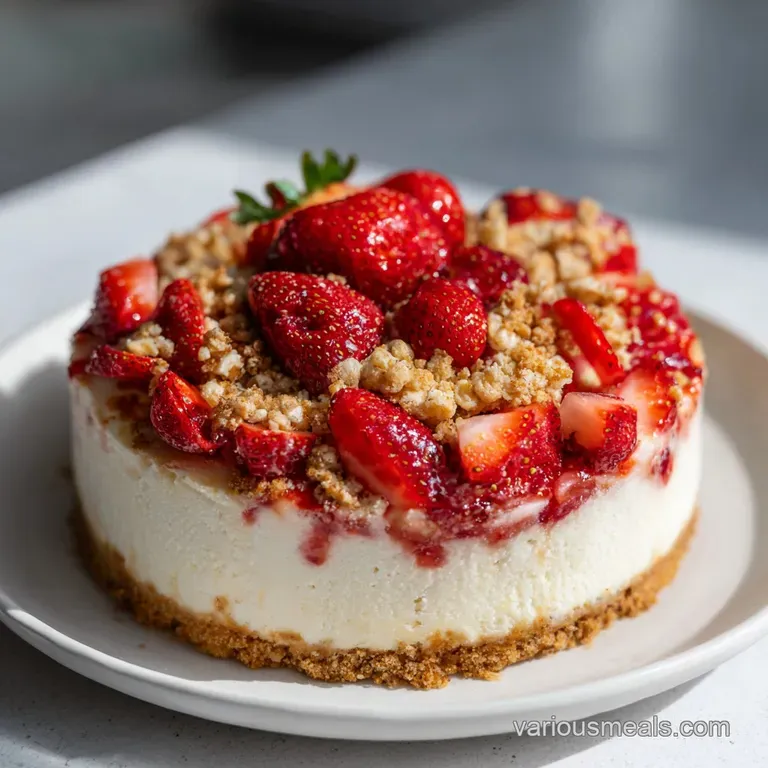
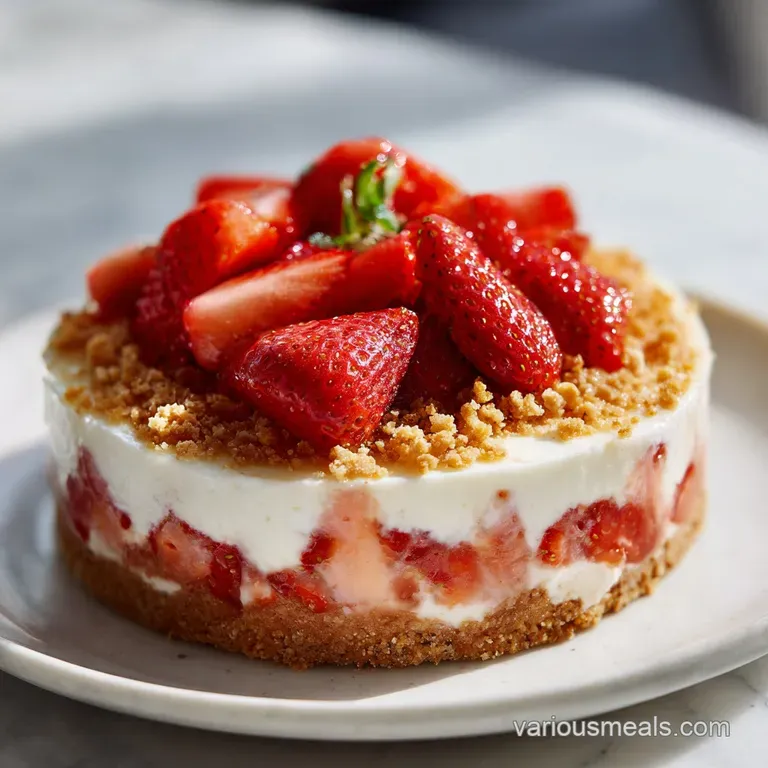
Strawberry Crunch Cheesecake Cake
- Time: Active 45 minutes, Passive 75 minutes, Total 120 minutes
- Flavor/Texture Hook: Lush, velvety cheesecake meets the nostalgic shatter of a strawberry shortcake ice cream bar.
- Perfect for: Milestone birthdays, family reunions, or any celebration where you want a "wow" factor.
- Master the Strawberry Crunch Cheesecake Cake
- Why These Flavors Layer So Well
- Specs for Your Showstopping Cake
- The Best Components for Flavor
- Tools for Successful Cake Building
- Steps to Build Your Cake
- Fixing Baking and Stacking Issues
- Flavor Swaps for Your Celebration
- Storage Tips and Zero Waste Ideas
- Serving Your Strawberry Crunch Masterpiece
- Recipe FAQs
- 📝 Recipe Card
Master the Strawberry Crunch Cheesecake Cake
The first time I attempted this Strawberry Crunch Cheesecake Cake, my kitchen smelled like a dream. It was that specific, concentrated aroma of strawberry puree reducing on the stovetop, a scent so thick you could almost taste it in the air.
I remember standing over the pot, watching the bright red liquid bubble down into a jammy concentrate, knowing that this single step was the secret to avoiding a soggy, flavorless sponge.
There is something so satisfying about the contrast of textures here - the way your fork glides through the soft frosting, meets the slight resistance of the crunch, and then sinks into the dense, cool cheesecake center.
If you grew up chasing the ice cream truck for those strawberry shortcake bars, this cake is your childhood reimagined for a grown up palate. We aren't just throwing together a box mix and some sprinkles.
We are building layers of flavor, starting with a cheesecake that is baked "low and slow" to prevent those pesky cracks, followed by a sponge that gets its moisture from a clever mix of butter and oil.
It’s a bit of a project, I’ll admit, but the look on your family’s faces when you slice into those three distinct, beautiful layers makes every minute in the kitchen feel like a victory.
Honestly, the hardest part of this recipe isn't the baking - it's the waiting. You have to let that cheesecake layer chill completely, ideally overnight, before you even think about stacking.
I’ve made the mistake of rushing it before, and let’s just say a "cheesecake landslide" is not the look we are going for. Trust me on this: patience is your most important ingredient here. Once you nail the assembly, you'll have a dessert that isn't just a treat, but a memory in the making.
Why These Flavors Layer So Well
Puree Reduction: Boiling down the strawberry puree removes excess water while concentrating the natural sugars and acids, ensuring the cake rises properly without becoming gummy.
Hybrid Fat Sponge: Using both butter and vegetable oil provides the best of both worlds: the butter offers a rich, traditional flavor while the oil keeps the crumb tender even when the cake is served cold.
Water Bath Stability: Baking the cheesecake in a bath of hot water keeps the ambient temperature consistent and the air moist, preventing the surface from drying out and cracking.
Freeze Dried Intensity: Pulverizing freeze dried strawberries into the crunch topping provides a massive hit of tartness and color that fresh berries simply cannot achieve due to their high water content.
| Method | Time | Texture | Best For |
|---|---|---|---|
| Traditional Oven | 75 minutes | Even, velvety crumb with a stable cheesecake center. | Getting that classic, professional bakery finish. |
| Stovetop (Water Bath) | 50 minutes | Extremely moist and dense, though harder to manage for cake layers. | The cheesecake portion only, if the oven is full. |
| Pressure Cooker | 35 minutes | Very dense and fudgy; loses some of the cake's airy fluffiness. | Quick cheesecake only prep when time is short. |
When you are deciding which method to use for this specific recipe, I always advocate for the oven. While the stovetop can handle the cheesecake layer in a pinch, the cake layers need the dry heat and air circulation of the oven to develop their structure. If you are looking for a simpler strawberry fix with a different texture, you might enjoy my Strawberry Poke Cake which uses a completely different moisture infusion technique.
Specs for Your Showstopping Cake
To get this recipe right on the first try, you need to understand the physical requirements of the layers. The cheesecake needs to be slightly smaller or the same size as your cake layers to ensure the frosting can cover everything smoothly.
Using 20 cm (8 inch) pans for both the cheesecake and the sponge layers is the most efficient way to achieve that professional, straight sided silhouette.
| Component | Science Role | Pro Secret |
|---|---|---|
| Cream Cheese | Provides the structural "fat" and the signature tangy base for the middle layer. | Use full fat blocks only; tub spreads contain too much air and water for baking. |
| Freeze Dried Berries | Adds concentrated acid and natural pigment without altering the moisture balance. | Pulse them into a fine dust to ensure the crunch coating sticks perfectly to the frosting. |
| Strawberry Puree | Acts as the primary flavor agent and provides natural humectants for the cake layers. | Always measure your puree after reducing it to ensure the ratio is exactly 0.5 cup. |
This recipe makes a tall, impressive cake that yields 13 generous servings. Because the cheesecake is so rich, you’ll find that even a thin slice is incredibly filling. The protein from the 8 grams per serving helps balance the sweetness, though this is definitely a "treat yourself" kind of dessert. If you find yourself with extra berries and want to try a different texture, my Homemade Strawberry Cake is a fantastic scratch made alternative that skips the cheesecake layer.
The Best Components for Flavor
For the cheesecake base, you will need 16 oz (about 450g) of full fat cream cheese, 2/3 cup (135g) of granulated sugar, 1/2 cup (120g) of sour cream, 2 large eggs, and 1 tsp of vanilla extract. Why this? Sour cream adds a necessary tang that cuts through the heavy richness of the cheese.
The strawberry cake layers require 2.5 cups (315g) of all purpose flour, 1.5 cups (300g) of granulated sugar, 2.5 tsp of baking powder, and 0.5 tsp of salt. For the wet ingredients, grab 0.5 cup (115g) of softened unsalted butter, 0.25 cup (60ml) of vegetable oil, 0.5 cup (120ml) of reduced strawberry puree, 0.75 cup (180ml) of whole milk, and 2 large eggs.
Why this? Reduced puree ensures the cake tastes like real fruit rather than artificial candy.
For the iconic crunch and frosting, gather 150g of vanilla wafer cookies, 1 cup (about 20g) of freeze dried strawberries, 3 tbsp (45g) of melted unsalted butter, and 1 tbsp of strawberry gelatin powder.
The frosting itself uses 8 oz (225g) of chilled cream cheese, 1 cup (225g) of slightly softened unsalted butter, 4 cups (500g) of powdered sugar, and another 1 tsp of vanilla extract.
| Original Ingredient | Substitute | Why It Works |
|---|---|---|
| Vanilla Wafers | Golden Oreos | Provides a similar crunch with a slightly sweeter, cream filled flavor profile. |
| Sour Cream | Full fat Greek Yogurt | Similar acidity and fat content; makes the cheesecake slightly denser. |
| Strawberry Puree | Raspberry Puree | Same pectin and moisture levels but adds a sharper, more tart flavor note. |
Tools for Successful Cake Building
To achieve those clean, professional layers, a few specific tools are non negotiable. First, you need an 8 inch (20 cm) springform pan for the cheesecake. The removable sides are the only way to get the cheesecake out without it crumbling into a mess.
You’ll also need two standard 8 inch cake pans for the sponge layers. I highly recommend using parchment paper rounds at the bottom of every pan; there is nothing more heartbreaking than a cake that refuses to leave its home.
A stand mixer (like a KitchenAid) or a powerful hand mixer is essential for the frosting and the cheesecake. You need to whip the air into the cream cheese and butter to get that "velvety" mouthfeel.
For the crunch coating, a food processor is the quickest way to get an even crumb, but if you don't have one, a heavy rolling pin and a sturdy zip top bag will do the job just fine. Just make sure the crumbs aren't too large, or they won't stick to the sides of the cake.
Finally,, grab a large roasting pan to act as your water bath. The springform pan will sit inside this roasting pan, surrounded by hot water. To prevent leaks, wrap the bottom and sides of the springform pan in at least two layers of heavy duty aluminum foil. This acts as a protective "boot" against the water.
Steps to Build Your Cake
1. The Velvet Cheesecake Foundation
Preheat your oven to 150°C (300°F). In a large bowl, beat the 16 oz of softened cream cheese and 2/3 cup of sugar until the mixture is completely smooth and no lumps remain. Add the sour cream and vanilla, then incorporate the 2 eggs one at a time on low speed.
Note: Over mixing at this stage can incorporate too much air, causing the cheesecake to puff and then collapse. Pour the batter into your foil wrapped springform pan. Place it in a roasting pan and fill the roasting pan with hot water until it reaches halfway up the sides of the cake pan.
Bake for 45-50 minutes. It is done when the edges are set but the center still has a slight, gelatinous jiggle. Turn off the oven, crack the door, and let it cool inside for an hour before moving it to the fridge to chill for at least 6 hours.
2. The Tender Strawberry Sponge
Increase the oven temperature to 175°C (350°F). In your mixer, cream together the 0.5 cup of softened butter, the 0.25 cup of vegetable oil, and 1.5 cups of sugar until the mixture looks pale and fluffy. This should take about 3-4 minutes.
Add your eggs one at a time, followed by the 0.5 cup of reduced strawberry puree. The batter might look slightly curdled at this point, but don't worry, the dry ingredients will fix it.
3. Incorporating the Dry Goods
In a separate bowl, whisk the flour, baking powder, and salt. With the mixer on low, add about a third of the flour mixture to the wet ingredients, followed by half of the milk. Repeat this process, ending with the flour.
Stop mixing the moment the last white streaks of flour disappear to avoid a tough cake. Divide the batter evenly between two greased and lined 8 inch cake pans. Bake for 25-30 minutes until a toothpick inserted into the center comes out clean.
Let them cool in the pans for 10 minutes before transferring to a wire rack.
4. Engineering the Signature Crunch
While the cakes cool, place your vanilla wafers and freeze dried strawberries in a food processor. Pulse until you have a mix of fine dust and small, pea sized crumbs. Transfer to a bowl and stir in the 3 tbsp of melted butter and the strawberry gelatin powder.
The gelatin adds a hit of concentrated color and that classic "box mix" strawberry flavor that we all love. Set this aside in a cool place so the butter doesn't make it too greasy.
5. The Finishing Frosting Touch
For the frosting, beat the 1 cup of slightly softened butter and 8 oz of chilled cream cheese until the mixture is light and airy. Gradually add the 4 cups of powdered sugar, one cup at a time, followed by the vanilla.
If the frosting feels too soft, pop it in the fridge for 15 minutes to firm up. It needs to be sturdy enough to hold the weight of the cake layers.
6. The Structural Cake Assembly
Place one strawberry cake layer on your serving plate or a cake board. Spread a thin layer of frosting over the top. Carefully remove the chilled cheesecake from its pan and place it directly on top of the first cake layer. Add another thin layer of frosting, then top with the second strawberry cake layer.
Frost the entire exterior of the cake with the remaining cream cheese frosting. Don't worry about making it look perfect - the crunch is going to cover everything.
7. Applying the Crunch
Gently press the strawberry crunch mixture into the sides and top of the cake using your hands or a flat spatula. Work in small sections to ensure even coverage. If the crumbs aren't sticking, your frosting might have crusted over; simply mist it very lightly with a tiny bit of water or add a fresh smudge of frosting.
Once covered, chill the cake for at least 30 minutes before slicing to let everything set into place.
Fixing Baking and Stacking Issues
Why Your Cheesecake Cracked
A cracked cheesecake is usually the result of a sudden temperature change or over beating the eggs. When you whip the eggs too much, they trap air that expands in the oven and then contracts as it cools, pulling the surface apart.
To fix this, always use room temperature eggs and keep the mixer on the lowest possible speed once the eggs are added. If it still cracks, don't panic - the strawberry cake and frosting will cover it up completely!
| Problem | Root Cause | Solution |
|---|---|---|
| Cake is gummy | Puree wasn't reduced enough. | Boil puree until it's reduced by half before measuring. |
| Layers are sliding | Cheesecake was too warm. | Chill cheesecake for a full 6 hours (or overnight) before stacking. |
| Crunch is soggy | Butter was too hot or crumbs were too fine. | Let melted butter cool slightly and keep some larger wafer pieces for texture. |
One of the biggest mistakes I see people make is trying to frost a cake that is still slightly warm. Even a tiny bit of residual heat will turn your cream cheese frosting into a liquid mess.
If you find your layers shifting, stick a couple of wooden skewers through the entire height of the cake to "pin" the layers together while it chills in the fridge. Just remember to remove them before you serve it to your guests!
Common Mistakes Checklist:
- ✓ Ensure all cheesecake ingredients are room temperature to avoid a lumpy batter.
- ✓ Triple wrap your springform pan in foil to prevent the water bath from seeping in.
- ✓ Reduce the strawberry puree until it is thick and jam like, not watery.
- ✓ Let the cake layers cool completely on a wire rack to prevent moisture buildup on the bottom.
- ✓ Chill the assembled cake for 30 minutes before slicing to ensure clean, beautiful layers.
Flavor Swaps for Your Celebration
If you want to move away from the traditional strawberry profile, this template works beautifully with other fruits. You can substitute the strawberry puree for raspberry or even a concentrated blueberry reduction.
For a "Golden Oreo" twist, replace the vanilla wafers in the crunch with crushed Golden Oreos and use freeze dried raspberries for a sharper, more sophisticated tartness that contrasts the sweet cream cheese.
For a gluten-free celebration, you can swap the all purpose flour for a high-quality 1:1 gluten-free flour blend. Just keep in mind that gluten-free cakes tend to be a bit more fragile, so you might want to add an extra 5 minutes to the baking time to ensure the structure is set.
The vanilla wafers should also be swapped for a gluten-free alternative, which are now widely available in most large grocery stores.
Scaling this recipe can be a bit tricky because of the pan sizes. If you want to make a smaller version, I recommend making "Strawberry Crunch Cheesecake Bites" by baking the cheesecake in a muffin tin and using a small round cutter for the cake layers.
If you are scaling up for a huge party, it’s often safer to make two separate 8 inch cakes rather than trying to bake one massive 12 inch version, as the cheesecake layer becomes very difficult to move without breaking as it gets larger.
Storage Tips and Zero Waste Ideas
This Strawberry Crunch Cheesecake Cake must be stored in the refrigerator due to the high dairy content in the cheesecake and frosting. It will stay fresh and delicious for up to 4 days if kept in an airtight container or tightly wrapped in plastic wrap.
If you find the crunch topping starts to lose its "shatter" after a few days in the fridge, you can actually keep a small bowl of extra crunch on the side and press a fresh handful into the slices just before serving.
For long term storage, this cake freezes surprisingly well! You can freeze the entire cake or individual slices. Wrap them in two layers of plastic wrap and then a layer of aluminum foil. It will stay good for up to 2 months. To eat, let it thaw in the refrigerator overnight.
Do not thaw it on the counter, as the cheesecake layer can become "weepy" and lose its velvety texture if it warms up too quickly.
If you have leftover cake scraps from leveling your layers, don't throw them away! You can crumble the extra strawberry sponge, mix it with a spoonful of frosting, and roll them into "cake truffles." Roll the truffles in any leftover strawberry crunch mixture for a zero waste treat that tastes just like the big cake.
You can also use leftover strawberry puree in your morning yogurt or as a swirl in a batch of pancakes.
Serving Your Strawberry Crunch Masterpiece
When it comes time to serve, use a long, thin knife dipped in hot water and wiped dry between every single cut. This is the only way to get those sharp, professional looking slices where the cheesecake and cake layers stay perfectly distinct.
Because this cake is quite tall and rich, I usually suggest cutting it into 13 wedges, but you could easily get 16 smaller slices if you are serving it at a large party.
I love serving this with a few fresh strawberries on the side to reinforce that natural fruit flavor. The contrast between the cold, creamy cheesecake and the room temperature fresh berries is wonderful.
If you want to go truly over the-top, a small dollop of whipped cream and a sprinkle of any leftover crunch dust makes each plate look like it came from a high end bakery.
This cake is more than just a dessert; it’s a conversation starter. There’s something about that bright pink crunch and the hidden cheesecake layer that brings out the kid in everyone.
Whether you’re sharing it at a Sunday family dinner or bringing it to a friend's house, it’s a recipe that feels traditional yet surprising. Just be prepared to share the recipe - once people taste that velvety center and the nostalgic crunch, they’ll definitely be asking how you did it!

Recipe FAQs
How to prevent the cheesecake layer from cracking?
Bake the cheesecake in a water bath at 300°F (150°C). The gentle, moist heat prevents the eggs from overcooking and pulling away from the pan sides, keeping the texture smooth.
Can I use frozen strawberries for the cake batter?
No, stick with the specified reduced strawberry puree. Fresh or frozen berries add excess moisture that alters the cake structure, whereas reducing the puree concentrates the flavor without thinning the batter.
How to keep the strawberry crunch topping crispy?
Apply the crunch coating just before serving. While the cake stores well in the refrigerator for up to 4 days, the gelatin and wafer mixture will soften over time; if you enjoyed the precision required for this texture, check out how we manage delicate fruit finishes in our make-ahead strawberry guide.
Is it necessary to use a water bath for the cheesecake?
Yes, it is essential for a professional texture. The water bath acts as an insulator, ensuring the 16 ounces of cream cheese bake evenly at 300°F (150°C) without developing a rubbery edge.
How to tell when the cheesecake is finished baking?
Look for a slight jiggle in the center after 45-50 minutes. The edges should be set, but the center should still move slightly; it will firm up completely while chilling.
Can I assemble this cake ahead of time?
Yes, and it actually improves the structural integrity. You can assemble the layers and frost the cake, then keep it refrigerated for up to 4 days before adding the crunch coating.
How to ensure the cream cheese frosting is smooth?
Beat the 8 ounces of chilled cream cheese and 1 cup of butter until perfectly fluffy before adding sugar. This initial aeration is the secret to a stable, lump free frosting that holds the weight of your cake layers.
Strawberry Crunch Cheesecake Cake

Ingredients:
Instructions:
Nutrition Facts:
| Calories | 909 kcal |
|---|---|
| Protein | 8 g |
| Fat | 52 g |
| Carbs | 98 g |
| Fiber | 2 g |
| Sugar | 78 g |
| Sodium | 420 mg |
