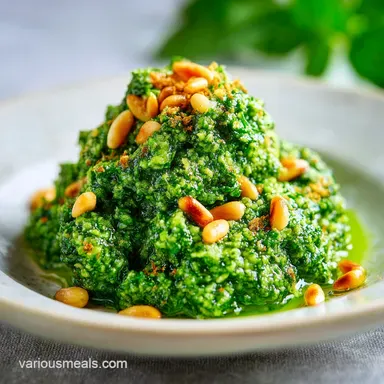
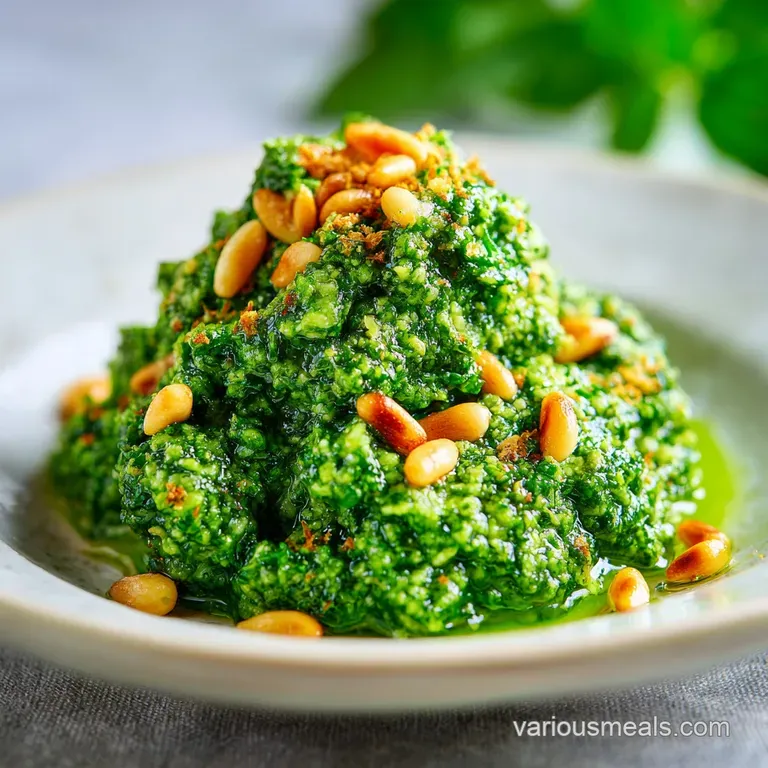
Dairy Free Pesto: Whole30 and Silky
- Time: 5 min active + 0 min chilling = Total 5 mins
- Flavor/Texture Hook: Silky, vibrant, and zesty
- Perfect for: Weeknight meal prep, quick lunches, or Whole30 dinner swaps
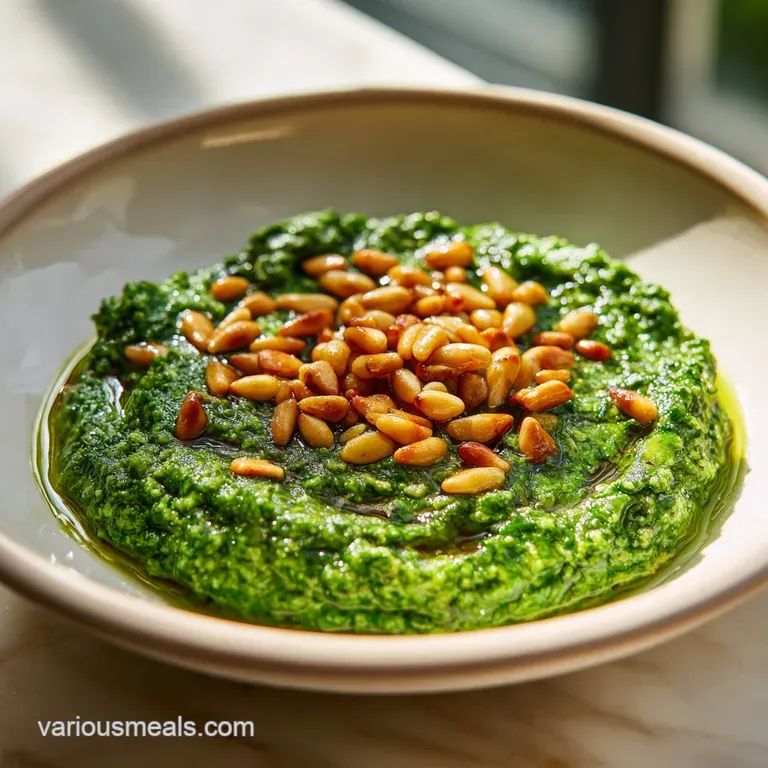
Dairy free Pesto
Ever wonder why some plant based sauces feel thin or "watery" while others have that heavy, clinging quality of traditional pesto? I used to think the cheese did all the heavy lifting.
I remember the first time I tried to skip the parmesan for a guest who was dairy-free, and my first attempt was basically just basil flavored oil. It was a disaster that left my pasta swimming in a green puddle.
The trick isn't adding a fake cheese replacement, but leaning into the fats already present in the nuts and oil. When you get the timing right, you get a sauce that's glossy and clings to everything it touches. It's a total shift in how you think about "creamy" textures.
This version is a fast, nutrient dense way to get a huge hit of flavor on your plate. Whether you're doing a dairy free pesto whole30 challenge or just want a cleaner alternative to the jarred stuff, this is the way to go. It's fast, budget friendly, and honestly, you might forget the cheese is missing.
Secret To The Texture
- Nut Fat: Pine nuts provide a buttery base that replaces the richness of hard cheeses.
- Oil Drizzle: Adding oil slowly creates a stable bond, making the sauce velvety instead of greasy.
- Acid Balance: Lemon juice cuts through the heavy fats, keeping the flavor bright.
- Pulse Control: Coarse chopping first prevents the basil from heating up and turning brown.
| Method | Time | Texture | Best For |
|---|---|---|---|
| Fresh Processed | 5 mins | Silky & Vibrant | Fresh Pasta |
| Food Processor | 5 mins | Coarser | Sandwiches |
| Mortar & Pestle | 15 mins | Chunky/Rustic | Crostini |
Right then, let's look at what's actually happening inside the blender. Most people just throw everything in and hit "blend", but that's where things go wrong. By pulsing the nuts and garlic first, you create a structural base. This ensures you don't end up with huge chunks of garlic in one bite and none in the next.
Component Analysis
| Ingredient | Science Role | Pro Secret |
|---|---|---|
| Fresh Basil | Flavor Base | Pat dry to prevent water streaks |
| Pine Nuts | Fat & Body | Toast lightly for more depth |
| Olive Oil | Emulsion Agent | Use a neutral EVOO for mildness |
| Lemon Juice | Color Preserver | Prevents the basil from oxidizing |
What You'll Need
For this recipe, keep it simple. We aren't using fancy fillers, just a few high-quality, plant forward ingredients.
- 2 cups (60g) fresh basil leaves, packed Why this? Provides the core aromatic profile
- 1/3 cup (45g) pine nuts Why this? Adds the necessary creaminess
- 2 cloves (6g) garlic, peeled Why this? Adds a sharp, savory bite
- 1 tbsp (15ml) fresh lemon juice Why this? Brightens the fats
- 2 tbsp (30ml) extra virgin olive oil (initial) Why this? Helps the initial chop
- 1/2 cup (120ml) extra virgin olive oil (emulsion) Why this? Creates the final silky texture
- 1/2 tsp (3g) sea salt Why this? Enhances all other flavors
- 1/4 tsp (1g) black pepper Why this? Adds a subtle heat
If you're looking for a dairy free nut free pesto, you can easily swap the pine nuts for toasted sunflower seeds. They have a similar fat profile and keep the recipe budget friendly.
If you're leaning into a dairy free pesto with walnuts, you'll get a slightly earthier, more bitter tone that pairs great with roasted veggies.
Essential Tool List
You don't need a professional kitchen for this. A standard food processor is your best bet, but a high speed blender works too. Just be careful not to over process, or you'll turn your sauce into a smoothie.
I've found that using a small processor prevents the ingredients from just spinning around without getting chopped. If you have a massive blender, you might need to scrape the sides down a few times to make sure every basil leaf is incorporated.
Step-by-step Instructions
- Place the basil, pine nuts, garlic, and the first 2 tbsp (30ml) of olive oil in the food processor.
- Pulse 5-7 times until the ingredients are coarsely chopped. Note: Don't over blend here or the basil will bruise
- Turn the processor to medium low speed.
- While the motor is running, slowly drizzle in the remaining 1/2 cup (120ml) of olive oil in a steady stream until the sauce is smooth and glossy.
- Add the lemon juice, salt, and pepper.
- Pulse 2-3 more times just to incorporate the seasoning.
- Taste for salt. Note: Different salts vary in potency
- Transfer to a glass jar for storage.
Chef Tip: If you want a deeper flavor, toast your pine nuts in a dry pan for 2-3 mins until they smell like popcorn. Let them cool completely before adding them to the processor so they don't wilt the basil.
Avoiding Kitchen Disasters
One of the most common issues I see is the "brown out." Basil is sensitive to heat and oxygen. When the blades of a processor spin too fast, they generate heat, which kills the vibrant green color. This is why pulsing is your best friend.
Why Your Pesto Browns
Oxidation happens when the basil cells break and hit the air. The lemon juice helps, but the real secret is a layer of oil. If you store it in a jar, always pour a thin layer of olive oil over the top to seal out the oxygen.
Why Your Sauce Separates
This usually happens if the oil was dumped in all at once rather than drizzled. You need that slow stream to create a stable bond between the nut fats and the oil. If it separates, just pulse in a teaspoon of warm water or more lemon juice to pull it back together.
Taming The Garlic
If your garlic tastes too "hot" or aggressive, it's because it was chopped too finely or the cloves were very fresh. You can mellow it out by letting the finished pesto sit for 30 mins before serving, which lets the flavors marry.
| Problem | Root Cause | Solution |
|---|---|---|
| Dull Green Color | Over processing/Heat | Pulse instead of blending |
| Oily Texture | Oil added too fast | Drizzle slowly while running |
| Too Bitter | Burnt pine nuts | Toast on low heat, cool first |
Common Mistakes Checklist
- ✓ Don't use pre shredded "pesto mixes" from the store.
- ✓ Avoid using bottled lemon juice; it's too acidic and lacks brightness.
- ✓ Don't blend on high for more than 30 seconds.
- ✓ Never add the oil all at once.
- ✓ Ensure basil is completely dry before processing.
Adjusting Batch Sizes
When you're making this for a crowd or just for yourself, the ratios stay mostly the same, but the technique changes slightly.
Scaling Down (½ Batch) If you're only making a small amount, use a mini chopper. Since there's less volume, the blades might struggle to catch the basil. I recommend adding an extra teaspoon of oil at the start to get things moving. Reduce the processing time by about 20%.
Scaling Up (2x-4x Batch) When doubling or tripling the recipe, don't just multiply the salt and pepper by four. Start at 1.5x the seasoning, taste it, and then add more. For larger batches, work in two stages to avoid overheating the motor of your food processor. According to Serious Eats, maintaining a cool temperature is key to keeping herbs vibrant.
If you're using this as a base for a larger meal, like a Creamy Tomato Chicken Pasta, you can thin the pesto with a bit of pasta water to make it stretch further.
Pesto Common Misconceptions
Some people think you have to cook pesto to make it safe or "set" the flavor. That's a huge mistake. Heat destroys the delicate aromatics of the basil and turns the sauce a muddy brown. Always stir your dairy free pesto into the pasta after you've taken it off the burner.
Another myth is that you need a nutritional yeast supplement to get a "cheesy" taste. While yeast works, it can sometimes taste a bit too "nutty" or synthetic. The pine nuts in this recipe provide enough natural creaminess that you don't actually need the additives for a great result.
Storage Guidelines
To keep your sauce vibrant, store it in an airtight glass jar in the fridge for up to 5 days. The most important part is the "oil cap" - always keep the top covered with a thin layer of olive oil to prevent browning.
For long term storage, I love using ice cube trays. Freeze the pesto in 1 tablespoon portions, then pop the cubes into a freezer bag. They'll stay fresh for about 3 months. This makes it incredibly easy to add a hit of flavor to a pan of sautéed vegetables or a piece of grilled salmon.
To avoid waste, don't throw away the basil stems. You can toss them into a freezer bag with other veggie scraps to make a nutrient dense vegetable broth later. Even the leftover pine nut dust at the bottom of the bag can be stirred into a salad dressing.
Pairing Ideas
This sauce is incredibly versatile. While pasta is the obvious choice, you can use a free pesto whole30 style as a marinade for chicken or shrimp. Just coat the protein for 30 mins before grilling.
If you're looking for a side dish, this pairs beautifully with roasted cauliflower or zucchini. You can also use it as a spread for a turkey sandwich or a dip for raw crudités. For another quick sauce option for your meal prep, you might enjoy a Homemade Ranch Dressing, though this pesto offers a more plant forward profile.
Since this is essentially a concentrated flavor bomb, a little goes a long way. Try swirling a spoonful into a bowl of white beans and spinach for a 5 minute healthy lunch. It's the ultimate budget friendly way to make simple ingredients feel a bit more special.
Recipe FAQs
Is there a dairy free pesto?
Yes, you can make a rich version without cheese. By using lemon juice for acidity and pine nuts for creaminess, you get a bright sauce that tastes great without any animal products.
Is pesto Whole30 compliant?
Yes, provided it contains no cheese or sugar. This specific recipe relies on olive oil and nuts, making it perfectly aligned with Whole30 guidelines.
Does vegan pesto lack the depth of traditional versions?
No, this is a common misconception. The healthy fats from the pine nuts and extra virgin olive oil mimic the richness and mouthfeel of parmesan.
How to make pesto pasta creamy without dairy?
Save a splash of starchy pasta water. Stir this liquid into your pesto coated pasta to emulsify the olive oil and create a silky, clinging sauce.
How to prevent pesto from turning brown?
Create an "oil cap" on top of the jar. Keep the surface of the sauce covered with a thin layer of olive oil to block oxygen from reaching the basil.
How to avoid bruising the basil during blending?
Pulse the ingredients coarsely first. Pulse 5-7 times before switching to medium low speed to drizzle in the oil, which prevents the blades from overheating the leaves.
How to store pesto for long term use?
Freeze the sauce in ice cube trays. Transfer the frozen cubes to a freezer bag for up to 3 months; they are excellent for adding quick flavor to a bowl of root vegetable soup.
dairy free Pesto