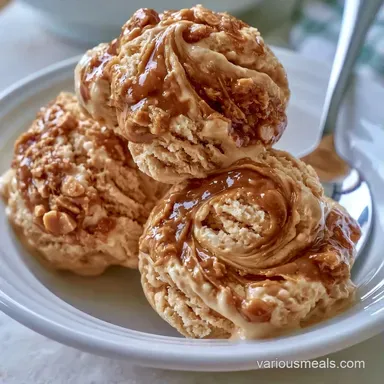
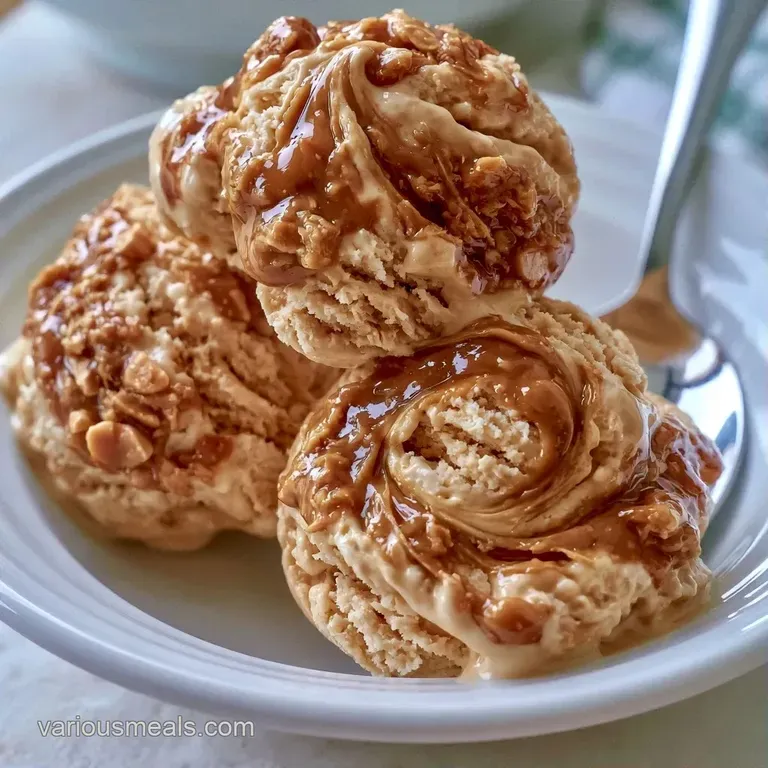
High-Protein Peanut Butter Ice Cream: Creamy

- Time: 10 min active + 24 hours chilling
- Flavor/Texture Hook: Rich, nutty, and smooth
- Perfect for: Post workout treats or nutrient dense meal prep
- Easy Peanut Butter Protein Ice Cream
- Why This Blend Works
- Everything You'll Need
- Essential Kitchen Tools
- Step-By-Step Mixing Process
- Fixing Texture Issues
- Different Flavor Options
- Adjusting the Batch Size
- Common Dessert Misconceptions
- Storage And Keeping
- Suggested Food Pairings
- Recipe FAQs
- 📝 Recipe Card
The sound of a blender whirring at 6 AM is usually a bad sign, but for me, it's the start of a great day. I spent a few months trying to find a snack that actually satisfies a sugar craving without crashing my energy levels by noon. Most healthy options tasted like frozen cardboard or felt like eating a popsicle.
Then I started messing with high protein bases in my pint containers. I wanted something that felt substantial but fit into a budget friendly meal prep routine. This specific blend of peanut butter and vanilla hits that spot every time.
You can expect a treat that feels like a real dessert but keeps you full. This Protein Ice Cream is designed for anyone who wants a nutrient dense alternative to store-bought pints. It's simple, focused on health, and doesn't require fancy pastry skills.
Easy Peanut Butter Protein Ice Cream
Right then, let's talk about why this actually works. Most frozen treats fail because of large ice crystals that make them feel grainy. By using a high shear process, we basically crush those crystals into nothing.
- Fat Content
- The peanut butter provides the lipids needed to keep the mix from becoming a block of ice.
- Protein Structure
- The powder acts as a stabilizer, giving the mix a thicker, more cohesive body.
- Low Water
- Using almond milk instead of water prevents the "icy" feeling common in healthy desserts.
The trick here is the freeze time. If you pull it out at 20 hours, it's too soft. Wait the full 24 hours so the core is solid.
| Method | Prep Time | Texture | Best For |
|---|---|---|---|
| Fast Spin | 10 mins + 24h freeze | Dense and smooth | Daily meal prep |
| Classic Churn | 30 mins + 6h freeze | Airy and light | Traditional desserts |
Why This Blend Works
Let's look at the specific ingredients. I've found that some powders clump, so the order of operations matters here.
| Ingredient | What It Does | Best Swap |
|---|---|---|
| Almond Milk | Provides a neutral, low cal liquid base | Soy milk for more protein |
| Protein Powder | Creates the structure and thickness | Casein blend for extra thickness |
| Peanut Butter | Adds healthy fats and richness | Almond butter for a milder taste |
| Maple Syrup | Provides a clean, natural sweetness | Honey or agave |
Everything You'll Need
For the base, stick to these measurements. Trust me on the salt, it cuts through the sweetness of the protein powder.
- 1 cup (240ml) unsweetened almond milk
- 1 scoop (30g) vanilla or peanut butter protein powder Why this? Adds the bulk of the protein and primary flavor
- 2 tbsp (32g) creamy peanut butter Why this? Essential for the creamy mouthfeel
- 1 tbsp (12ml) maple syrup Why this? Natural sweetener that blends well
- 1 tsp (5ml) vanilla extract
- 1g sea salt
For the mix ins: - 1 tbsp (16g) creamy peanut butter - 1 tbsp (15g) dark chocolate chips
Essential Kitchen Tools
You don't need a full bakery, but a few specific tools make this a lot easier. I use an immersion blender because it gets the powder integrated without needing to wash a giant blender jar.
A pint sized freezer container is a must. If you're using a machine like the Ninja Creami, the specific pint is required. Otherwise, make sure your container is freezer safe and has a tight lid to prevent ice crystals from forming on the surface.
Step-by-step Mixing Process
Let's crack on with the actual making. This is a three phase process: blend, freeze, and spin.
Phase 1: Blending the Base
- Add the almond milk, protein powder, peanut butter, syrup, vanilla, and salt into the pint container.
- Use an immersion blender to mix until the liquid is completely smooth and no clumps remain. Note: Blend for about 60 seconds to ensure total integration.
Phase 2: The Deep Freeze
- Place the lid on the container.
- Freeze on a level surface for 24 hours. Note: A level surface prevents the "hump" that can damage some machine blades.
Phase 3: The Creami Process
- Remove the pint from the freezer and place it in the outer bowl.
- Select the 'Lite Ice Cream' or 'Protein Ice Cream' setting.
- If the consistency is crumbly, add 1 tbsp (15ml) of almond milk and select the 'Re Spin' function. Wait until it looks glossy and smooth.
Phase 4: Adding the Ribbons
- Create a 1 inch wide hole down the center of the ice cream.
- Drizzle in warmed peanut butter and chocolate chips.
- Select the 'Mix In' setting to incorporate the ribbons.
Fixing Texture Issues
The most common complaint with Protein Ice Cream is the texture. Because we aren't using heavy cream, the balance of fat and water is delicate.
The "Powdery" Texture
This usually happens if the base didn't freeze completely or if the powder wasn't blended well. It feels like eating frozen sand.
Icy Pockets
If you see chunks of ice, your freezer might be too cold, or you didn't use enough fat. Adding a tiny bit more peanut butter to the base next time usually fixes this.
The "Bumpy" Mix in
If the chocolate chips are too large, they can create gaps in the texture. Use mini chips for a more consistent bite.
| Problem | Root Cause | Solution |
|---|---|---|
| Crumbly texture | Too cold / low fat | Add 1 tbsp milk and Re Spin |
| Gritty feel | Poor blending | Use immersion blender for 60s |
| Over spun | Friction heat | Stop immediately and refreeze |
Different Flavor Options
Once you have the base down, you can change the profile. I often swap the flavors to keep my meal prep from getting boring.
If you want a different vibe, you can try a Vanilla Protein Ice Cream for a cleaner taste. It works great with fresh berries.
For something more decadent, try a Chocolate Protein Ice Cream by swapping the vanilla powder for chocolate and adding a pinch of espresso powder.
If you're feeling adventurous, a Butter Protein Ice Cream approach using browned butter in the base adds a toasted, nutty depth that is brilliant. Another version of Butter Protein Ice Cream can be made by adding a teaspoon of grass fed butter to the blending phase for extra richness.
Adjusting the Batch Size
Scaling this recipe is straightforward, but you have to be careful with the physics of the freeze.
Scaling Down (1/2 Pint): Use half of every ingredient. I recommend blending in a small jar first and then pouring it into the pint. Reduce the spin time slightly if your machine allows it.
Scaling Up (4 Pints): Don't try to blend four pints in one go unless you have a professional blender. Work in batches of two. When freezing, leave space between the pints in the freezer to allow air to circulate, otherwise, the center pints will take longer than 24 hours to freeze.
| Change | Adjustment | Note |
|---|---|---|
| Half Batch | 50% Ingredients | Use a smaller container |
| Double Batch | 100% Ingredients | Freeze in two separate pints |
| Low Cal | Swap maple for Stevia | Texture may be slightly icier |
Common Dessert Misconceptions
Some people think that all high protein desserts taste like chalk. That's usually because they use low quality whey without any fat. The peanut butter in this recipe masks those "off" flavors.
Another myth is that you need a professional churner for smooth results. While a churner helps, the high shear "spin" method used here actually creates a denser, more gelato like consistency.
Storage And Keeping
Store your Protein Ice Cream in the freezer in its original pint container. It stays fresh for about 7 days.
If it hardens too much after the first serving, don't panic. Let it sit on the counter for 5-10 minutes or pop it in the microwave for 10 seconds before scooping.
Zero Waste Tip: If you have leftover almond milk or protein powder, blend them with a frozen banana and a pinch of cinnamon for a quick smoothie. If you have a bit of peanut butter left in the jar, add a splash of hot water and stir it into your morning oats.
Suggested Food Pairings
This treat is quite rich, so I like pairing it with something tart. Fresh raspberries or sliced green apples provide a great contrast to the peanut butter.
If you're using this as a post workout snack, it pairs well with a handful of raw almonds. For a more filling meal, you could serve a small scoop alongside some Greek yogurt and hemp seeds. This makes the whole experience feel more like a nutrient dense bowl than just a dessert.
Recipe FAQs
Is protein ice cream actually healthy?
Yes, when made with whole ingredients. This version uses almond milk and peanut butter to provide a balance of protein and healthy fats without excess refined sugars.
How to make peanut butter protein ice cream?
Blend almond milk, protein powder, peanut butter, syrup, vanilla, and salt using an immersion blender. Freeze the mixture for 24 hours, then process it using the 'Lite Ice Cream' or 'Protein Ice Cream' setting.
Can you add protein ice cream to protein shakes?
Yes, it works great as a thickener. Using it instead of ice cubes adds a rich, creamy texture and extra protein to your drink.
Is it true that protein ice cream is always crumbly?
No, this is a common misconception. You can achieve a smooth consistency by adding a tablespoon of almond milk and using the 'Re-Spin' function if the initial spin is too dry.
How to fix the texture if the ice cream is too crumbly after spinning?
Add 1 tablespoon of almond milk. Select the 'Re-Spin' function to incorporate the liquid and smooth out the consistency.
How long can I store this protein ice cream in the freezer?
Up to 7 days. Store the ice cream in its original pint container to maintain freshness and prevent freezer burn.
How to add chocolate chips and peanut butter ribbons to the ice cream?
Create a 1 inch wide hole down the center of the ice cream. Drizzle in warmed peanut butter and chocolate chips, then select the 'Mix-In' setting. If you enjoyed the nutty profile of this dessert, see how we apply a similar flavor balance in our Thai Chicken Meatballs.
Peanut Butter Protein Ice Cream