Double Chocolate Protein Ninja Creami: Deep Cocoa Flavor
- Time: 5 min active + 24 hrs chilling
- Flavor/Texture Hook: Deep cocoa flavor with a thick, creamy consistency
- Perfect for: Post workout recovery or budget-friendly meal prep
- Why This Base Actually Works
- Deep Dive Into The Ingredients
- Necessary Ingredients and Swaps
- Simple Step-by-Step Instructions
- Fixing Common Texture Issues
- Adjusting the Batch Size
- Common Frozen Dessert Myths
- Storage Guidelines
- Serving Suggestions
- Flavor Twists and Substitutions
- Critical Sodium Level
- Recipe FAQs
- 📝 Recipe Card
The smell of dark cocoa powder hitting the blender always gets me excited. There is something about that rich, dusty scent that promises a treat without the usual sugar crash. I spent way too long trying to make "healthy" frozen desserts that ended up tasting like frozen yogurt mixed with cardboard.
The real hero here is the ultra filtered chocolate shake. I chose this because it strips out the excess sugar while keeping the protein high, which creates a much denser base than standard milk.
Using a regular shake often leaves the ice cream too thin, but the filtered version gives it a weight that feels like real gelato.
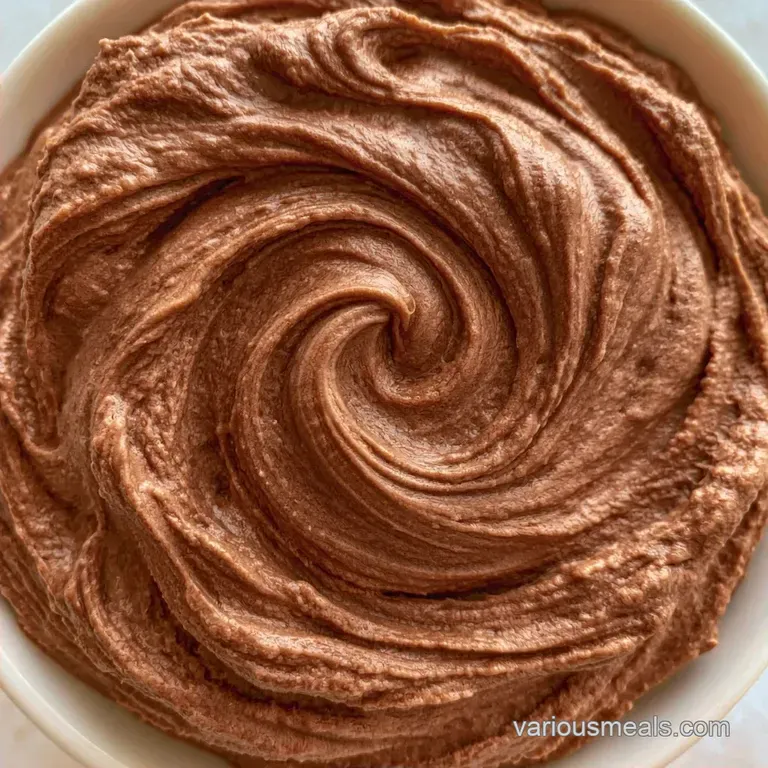
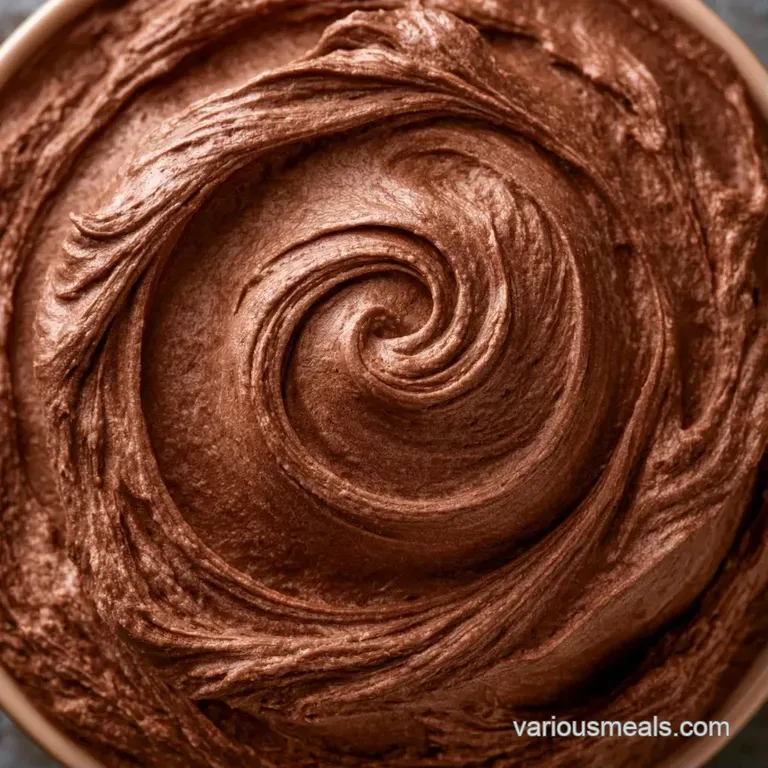
You can expect a rich, mahogany colored treat that actually satisfies a craving. This Chocolate Protein Ice Cream doesn't require a fancy churner, just a bit of patience for the freeze. It's a practical way to hit your protein goals while eating something that feels like a cheat meal.
Why This Base Actually Works
- Protein Blend: Using a mix of whey and casein creates a thicker structure that resists ice crystals.
- Pudding Mix: The modified cornstarch in the mix acts as a stabilizer, keeping the air bubbles trapped during the spin.
- Ultra Filtered Milk: The higher protein to water ratio means less water freezes into shards, making it smoother.
| Method | Time | Texture | Best For |
|---|---|---|---|
| Traditional Churn | 4-6 hours | Airy and light | Classic desserts |
| Ninja Creami Shortcut | 24 hours | Dense and creamy | High protein meal prep |
| Blender/Freeze | 2 hours | Icy or grainy | Quick cravings |
Deep Dive Into The Ingredients
The balance of fats and proteins determines whether your dessert is creamy or just a frozen block. According to the USDA FoodData, different protein sources vary in water retention, which is why the shake choice matters.
| Ingredient | What It Does | Best Swap |
|---|---|---|
| Fairlife Shake | Provides the liquid base and protein | Unsweetened soy milk + protein powder |
| Casein blend Powder | Adds thickness and creaminess | Pure whey (will be thinner) |
| Pudding Mix | Stabilizes the texture | 1/4 tsp Xanthan gum |
| Cocoa Powder | Deepens the chocolate flavor | Melted dark chocolate |
Necessary Ingredients and Swaps
- 1.5 cups (350ml) Fairlife Nutrition Plan chocolate shake Why this? High protein, low sugar, ultra smooth
- 1 scoop (30g) Chocolate whey or casein blend protein powder Why this? Casein adds a thicker, fudgier texture
- 1 tbsp (5g) Unsweetened dark cocoa powder Why this? Cuts through the sweetness
- 1 tbsp (8g) sugar-free instant chocolate pudding mix Why this? Essential for the creamy mouthfeel
- 1 tsp (5ml) Vanilla extract Why this? Enhances the chocolate notes
- 1 pinch (1g) Sea salt Why this? Balances the richness
- 2 tbsp (30g) Mini semi sweet chocolate chips Why this? Adds a necessary snap
- 1 tbsp (15g) Cocoa nibs Why this? Adds a bitter, nutty crunch
Simple step-by-step Instructions
- Combine the chocolate shake, protein powder, cocoa powder, pudding mix, vanilla, and salt in a blender. Note: A handheld frother works too if you mix directly in the pint.
- Blend 30 seconds until the liquid is a uniform, mahogany colored cream with no visible clumps.
- Secure the lid tightly and place the pint on a level surface in the freezer.
- Freeze for a full 24 hours at 0°F (-18°C). Note: Don't shorten this time or the spin will fail.
- Remove the pint from the freezer.
- Scrape the top flat with a spoon if a bump has formed.
- Place the pint in the outer bowl and process using the 'Lite Ice Cream' function.
- Add 1 tbsp (15ml) of milk to the center and process using the 'Re Spin' function if the texture looks powdery.
- Create a hole about 1 inch wide down the center of the ice cream.
- Pour in the chocolate chips and cocoa nibs and process using the 'Mix In' function.
Fixing Common Texture Issues
It's common to run into a few snags when you first start making high protein frozen treats. Most of the time, it's just a matter of hydration or temperature. If you find this version too intense, you might enjoy my Vanilla Protein Ice Cream for a lighter vibe.
The Powdery Finish
Sometimes the first spin leaves the mixture looking like wet sand. This happens when the base is too cold or lacks enough moisture to emulsify. A single tablespoon of liquid usually fixes it.
The Ice Peak
You might see a hard hump in the middle of the pint after freezing. This is just how the liquid expands. If you don't scrape it flat, the blade can get stuck or create an uneven texture.
Bitter Aftertaste
Too much cocoa powder can make the dessert taste like medicine. Stick to the measurement or add a tiny bit more vanilla to round out the flavor.
| Problem | Root Cause | Solution |
|---|---|---|
| Crumbly Texture | Too cold/Not enough fat | Use 'Re Spin' with 1 tbsp milk |
| Blade Overload | Ice peak not scraped | Level the top before spinning |
| Gritty Mouthfeel | Protein powder not dissolved | Use a blender instead of a whisk |
Adjusting the Batch Size
Scaling this recipe is straightforward, but you have to be careful with the mix ins. I usually make a single pint because it fits the machine, but if you're prepping for the week, just multiply the base.
For a half batch, use a smaller container if you have one, but be aware that the 'Lite Ice Cream' setting is designed for a full pint. You might need to run the 'Re Spin' twice to get the texture right.
When doubling the recipe, don't double the salt. Use about 1.5x the salt and vanilla. This prevents the flavors from becoming too sharp. Work in separate pints to ensure the 24 hour freeze is consistent across both.
Common Frozen Dessert Myths
Many people think that adding more fat is the only way to get a creamy texture. That's not true for protein based treats. The thickness actually comes from the protein structure and the stabilizers in the pudding mix.
Another myth is that you can freeze this in 12 hours and get the same result. You can't. The core of the pint needs the full 24 hours to reach a temperature where the blades can shave the ice into a cream.
Storage Guidelines
Keep your pint in the back of the freezer where the temperature stays constant. It stays fresh for about 7 days. If you leave it on the door, it will soften and refreeze, which creates ice crystals.
To avoid freezer burn, press a piece of parchment paper directly onto the surface of the ice cream before putting the lid back on. This blocks the air from touching the dessert.
For zero waste, if you have leftover protein shakes that are about to expire, you can freeze them into ice cubes. Toss those cubes into your next batch of Chocolate Protein Ice Cream to keep the base extra cold during mixing.
Serving Suggestions
This is best eaten immediately after the mix in cycle. If you've stored it in the freezer, let the pint sit on the counter for 5-10 minutes. This softens the edges and makes it easier to scoop.
For a little extra flair, top it with fresh raspberries. The tartness of the berries cuts through the heavy chocolate. If you're feeling fancy, a drizzle of almond butter adds a great salty contrast.
If you're meal prepping this for the week, portion it into smaller containers immediately after spinning. This stops you from digging into the main pint every day, which preserves the texture.
Flavor Twists and Substitutions
Depending on what's in your pantry, you can easily change the profile of this dish. If you love fruit and chocolate, try adding sliced strawberries, similar to the flavor profile in Chocolate Covered Strawberries.
The Peanut Butter Cup
Swap the cocoa nibs for 1 tbsp of powdered peanut butter and 1 tbsp of mini peanut butter chips. It transforms the flavor into a classic candy bar profile.
The Mocha Power Up
Add 1 tsp of instant espresso powder to the blender. The coffee intensifies the chocolate flavor without making it taste like a latte.
The Vegan Swap
Use a chocolate pea protein blend and a plant based chocolate shake. Use a vegan certified pudding mix or a pinch of guar gum to maintain the thickness.
The Keto Clean Version
Replace the semi sweet chips with lily's stevia sweetened chips. Ensure your protein powder is zero carb to keep it strictly keto.
| Original Ingredient | Substitute | Why It Works |
|---|---|---|
| Fairlife Shake | Unsweetened Almond Milk + 1 scoop Collagen | Similar liquid volume. Note: Less creamy than Fairlife |
| Whey/Casein Powder | Soy Protein Isolate | High protein content. Note: Slightly grainier texture |
| Semi Sweet Chips | Cacao Nibs (Double) | All natural. Note: Much more bitter, no added sugar |
Critical Sodium Level
1217 mg 1217 mg of sodium per serving (53% 53% of daily value)
The American Heart Association recommends that most adults limit their sodium intake to 2,300 mg per day, with an ideal limit of 1,500 mg for most adults with hypertension.
Tips to Reduce Sodium
-
Swap the Base Shake-30%
Replace the Fairlife Nutrition Plan shake with unsweetened almond milk or soy milk to drastically reduce the processed sodium base.
-
Omit Pudding Mix-20%
Remove the sugar-free instant pudding mix, which contains sodium based stabilizers, and use a small pinch of xanthan gum for thickness.
-
Low-Sodium Protein-15%
Check your protein powder label and switch to a brand with less than 100mg of sodium per scoop, such as a pure whey isolate.
-
Skip Added Salt-5%
Eliminate the pinch of sea salt entirely; the chocolate and protein powder already provide enough flavor profile.
-
Enhance with Spices
Add a dash of cinnamon or nutmeg to create a deeper, richer flavor that mimics the complexity of salt.
Recipe FAQs
How to make chocolate protein ice cream with Ninja CREAMi?
Blend the milk, protein powder, cocoa, pudding mix, vanilla, and salt until smooth. Freeze the mixture for 24 hours at 0°F and process using the 'Lite Ice Cream' function.
Can you put protein powder in the CREAMi?
Yes, it adds essential structure and nutrition. For more high protein options, try our almond flour pancakes.
What proteins work best in Ninja CREAMi?
Whey or casein blend protein powders are the best choice. Casein blends generally produce a thicker, creamier result than pure whey.
How to fix a powdery or crumbly texture after the first spin?
Add 1 tbsp of milk to the center and use the 'Re-Spin' function. This small amount of liquid helps the machine emulsify the frozen proteins into a smooth consistency.
Is it true that you need heavy cream to achieve a thick texture?
No, this is a common misconception. A combination of protein powder and sugar-free pudding mix creates a dense, creamy mouthfeel without the need for heavy cream.
How to prevent freezer burn when storing the pint?
Press parchment paper directly onto the ice cream surface. This blocks air from contacting the dessert, which prevents ice crystals from forming before you replace the lid.
How to add chocolate chips and cocoa nibs to the ice cream?
Create a 1 inch wide hole down the center and pour in the mix-ins. Process using the 'Mix-In' function to distribute the chips evenly throughout the pint.
Chocolate Protein Ice Cream 2

