Mexican Blender Salsa: Smoky and Zesty
- Time: 5 min active + 10 min resting
- Flavor/Texture Hook: Smoky, zesty, and slightly chunky
- Perfect for: Last minute parties, taco nights, or easy meal prep
Hear that crunch? That's the sound of a tortilla chip hitting a bowl of cold salsa. For the longest time, I thought you needed a heavy stone molcajete to make something that actually tasted authentic. I figured if I didn't spend an hour hand grinding chiles and tomatoes, it just wouldn't be right.
Honestly, that's a total myth. You don't need expensive equipment or hours of prep to get a punchy, smoky flavor. A standard blender does the job just fine, provided you don't turn your ingredients into a thin soup.
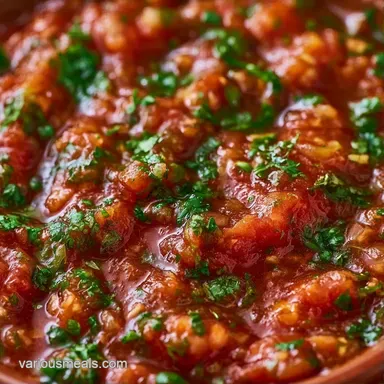
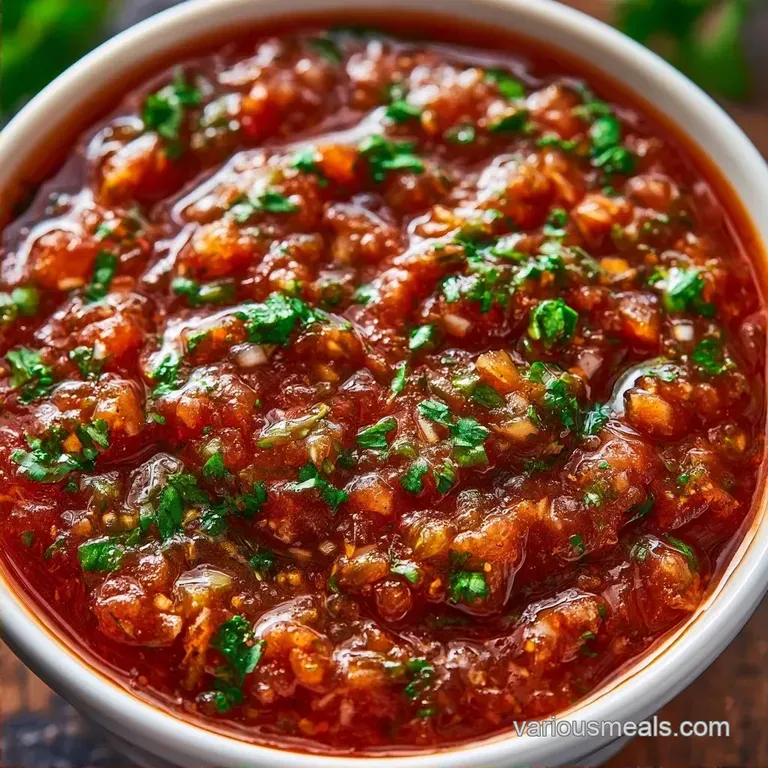
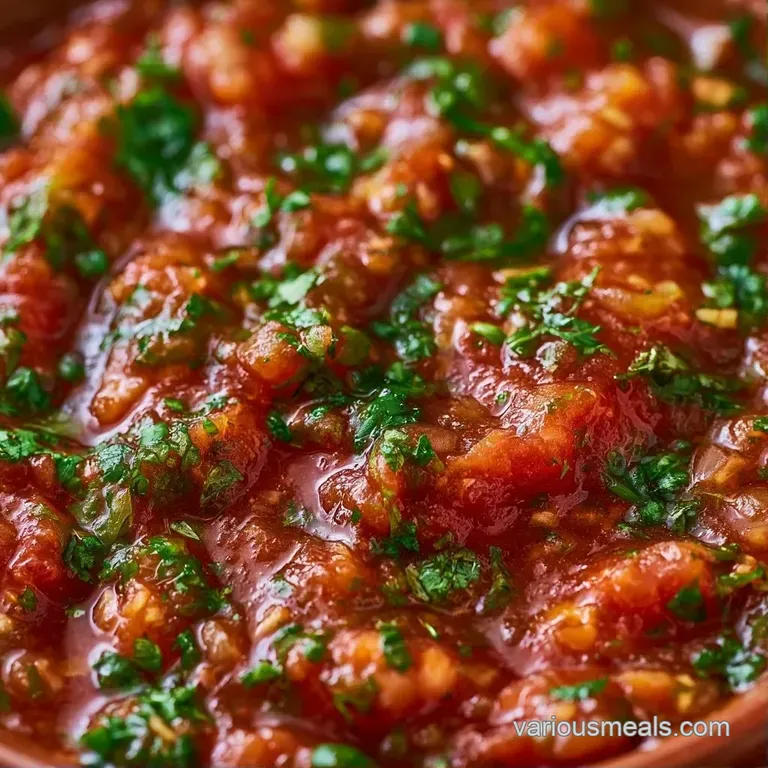
This Mexican Blender Salsa is all about balance and speed. It’s a low effort recipe that relies on fire roasted tomatoes to do the heavy lifting. You'll get a bright, tangy sauce that tastes like it simmered for hours, but it actually takes about five minutes of work.
Quick Facts on Mexican Blender Salsa
Since this is a raw blend, the "cooking" happens through the acidity of the lime and the time the flavors spend hanging out together. It's a stress free process that's great for beginners.
The Pulse Method: Pulsing instead of blending on high keeps the texture chunky. This prevents the salsa from becoming an emulsified sauce.
The Mellowing Period: Letting the salsa sit for 10 minutes allows the raw bite of the garlic and onion to soften. This creates a more cohesive flavor.
| Feature | Fresh Tomato Method | Shortcut (Canned) Method |
|---|---|---|
| Prep Time | 20-30 minutes | 5 minutes |
| Consistency | Watery, varies by season | Consistent, thicker |
| Flavor Profile | Bright, garden fresh | Smoky, concentrated |
| Best For | Summer picnics | Weeknight dinners |
Why These Ingredients Work
I've found that the order you put things in the blender changes everything. If you put the tomatoes first, the smaller bits of garlic and pepper just get stuck to the sides.
| Ingredient | What It Does | Best Swap |
|---|---|---|
| Fire Roasted Tomatoes | Provides the smoky base and bulk | Plain diced tomatoes (less smoky) |
| Lime Juice | Cuts through the salt and adds brightness | Lemon juice (more tart, less authentic) |
| White Onion | Adds a sharp, crisp aromatic note | Red onion (sweeter, more color) |
| Jalapeño | Brings the heat and a grassy flavor | Serrano pepper (significantly hotter) |
Simple Tools for the Job
You don't need a fancy setup here. A basic blender or even a food processor works. Just make sure your blades are sharp so you aren't over processing the vegetables.
I usually use a standard Ninja blender, but any brand that has a "pulse" button will do. If you only have a handheld immersion blender, you can still make this, but you'll need to be even more careful not to over blend.
Step by step Blending
Right then, let's get into it. The key to a great Mexican Blender Salsa is resisting the urge to just hit "blend" and walk away.
Phase 1: The Layering
Add ingredients to the blender in this specific order. Start with the lime juice and salt first. This creates a liquid base that helps the blades grab the harder vegetables. Next, toss in the onion, garlic, and jalapeño. Finally, pour the canned tomatoes and cilantro on top.
Phase 2: The Pulse
Use the pulse setting. Pulse 5-7 times in short bursts until the mixture is cohesive and mostly smooth. You want to see tiny fragments of tomato still floating around. If you go too far, it turns into a puree, which is a common mistake.
Phase 3: The Final Adjustment
Pour the salsa into a glass bowl. Taste it. This is where you decide if it needs another squeeze of lime or a pinch more salt. Note: Don't over salt now, as the flavors concentrate as it sits.
Let the salsa sit for 10 minutes. This is non negotiable. It gives the raw onion and garlic time to merge with the tomato base. According to USDA FoodData, the acidity in tomatoes and lime helps preserve the fresh aromatics while softening their harsh edge.
Tips to Avoid Common Blunders
I've made my share of mistakes. Once, I blended a batch for a full three minutes and ended up with something that looked like tomato soup. It was a disaster.
Chef's Note: If you want a deeper, earthier taste, add a tiny pinch of espresso powder or a drop of Worcestershire sauce. It sounds weird, but it mimics the depth of a slow roasted sauce.
Another thing: don't peel your jalapeño. Just stem it. The skin holds a lot of the flavor. However, if you're sensitive to heat, scrape out the white ribs and seeds before tossing it in.
| Problem | Root Cause | Solution |
|---|---|---|
| Salsa is too watery | Too much tomato juice or over blended | Strain some liquid or add more onion |
| Taste is too "sharp" | Didn't let it rest | Chill for 30 minutes in the fridge |
| Not enough "kick" | Jalapeño was mild | Add a pinch of cayenne or more pepper |
Fresh Swaps and Variations
This recipe is a great baseline. Once you're comfortable with the basic Mexican Blender Salsa, you can start tweaking it to fit your mood.
If you prefer a version that's even faster, you might like my Salsa in 5 Minutes recipe, which uses a few different shortcuts. For those who want something a bit more traditional, this version is a great step toward a full Salsa Mexicana.
For a smoky twist, try adding a chipotle pepper in adobo. Just one small pepper adds a massive amount of heat and a deep, charred flavor. If you want a "fruitier" vibe, swap half the canned tomatoes for a handful of fresh mango chunks.
Keeping Your Salsa Fresh
Since there's no cooking involved, this salsa stays vibrant. Store it in an airtight glass jar in the fridge for up to 5 days. Plastic containers can sometimes leach smells or let the salsa oxidize faster.
I don't recommend freezing this. The fresh cilantro and lime juice lose their punch in the freezer, and the texture becomes grainy when it thaws. It's just not worth it.
To avoid waste, don't throw away the stems of your cilantro. Chop them finely and throw them into a soup or a marinade. They actually have more concentrated flavor than the leaves.
Great Complements
This salsa is versatile. While chips are the obvious choice, it works as a fantastic marinade for grilled shrimp or chicken. The acidity of the lime helps tenderize the meat.
It also makes a great topping for a baked potato or a quick bowl of black beans and rice. If you're feeling fancy, spoon it over a piece of seared white fish like tilapia or cod. The smokiness of the fire roasted tomatoes cuts through the richness of the fish.
Keys to the Best Texture
If you're struggling to get that restaurant feel, check your pulsing rhythm. You want "staccato" bursts, not a long hum. This ensures the solids are broken down but not pulverized.
Another trick is to use cold ingredients. When the onion and garlic are cold, they hold their structure a bit longer in the blender, which helps maintain those tiny, desirable chunks.
- If you want it chunkier
- Pulse only 3-4 times.
- If you want it smoother
- Pulse 10-12 times.
- If you want it spicier
- Leave the jalapeño seeds in.
By following these steps, your Mexican Blender Salsa will have that professional balance of smoke, salt, and acid. It's a low effort win that makes any meal feel a bit more special.
Recipe FAQs
How to make this blender salsa?
Add lime juice and salt first, followed by aromatics, then canned tomatoes and cilantro. Pulse 5-7 times in short bursts until cohesive but slightly chunky. Let it sit for 10 minutes to mellow the flavors.
Is this an authentic Mexican blender salsa?
Yes, it captures traditional flavor profiles using a modern tool. Using fire roasted tomatoes and fresh aromatics provides the depth typically found in traditional cooked salsas.
Can I use fresh tomatoes instead of canned?
No, use canned fire roasted tomatoes for this specific result. Canned versions provide a consistent, smoky depth that fresh tomatoes lack. If you prefer raw produce, try a fresh tomato salsa instead.
How to achieve restaurant quality texture?
Pulse the blender in short bursts rather than running it continuously. Limiting yourself to 5-7 pulses ensures the mixture retains tiny fragments of tomato instead of turning into a smooth soup.
Is it true that you should peel the jalapeño for better flavor?
No, this is a common misconception. The skin holds a lot of the pepper's flavor; you only need to remove the stem.
Why does the salsa need to sit for 10 minutes?
To allow raw onion and garlic flavors to mellow. This resting period allows the sharp aromatics to integrate into the tomato base for a more balanced taste.
How to adjust the heat level?
Scrape out the white ribs and seeds from the jalapeño. Removing these parts reduces the spice while maintaining the vegetable's characteristic flavor.
Mexican Blender Salsa